Role Based Access Control for forms
formsflow.ai introduces the ability for designers to set permissions for forms, catering to both designers and client users. This functionality provides fine-grained control over the visibility of forms based on user roles.
With this feature, designers using formsflow.ai can define specific permissions with each form they create. They have the flexibility to determine which roles can view and interact with a particular form. By configuring these permissions, designers can ensure that only authorized individuals or user roles can access and work with the form.
Overall, this feature enhances the flexibility and control available to designers within formsflow.ai, empowering them to manage permissions and determine who can interact with their forms. It ensures that the visibility of forms aligns with the assigned roles, creating a more secure and tailored environment for both designers and client users.
-
Log in as a designer user and create a form (layout + flow), then save it.
-
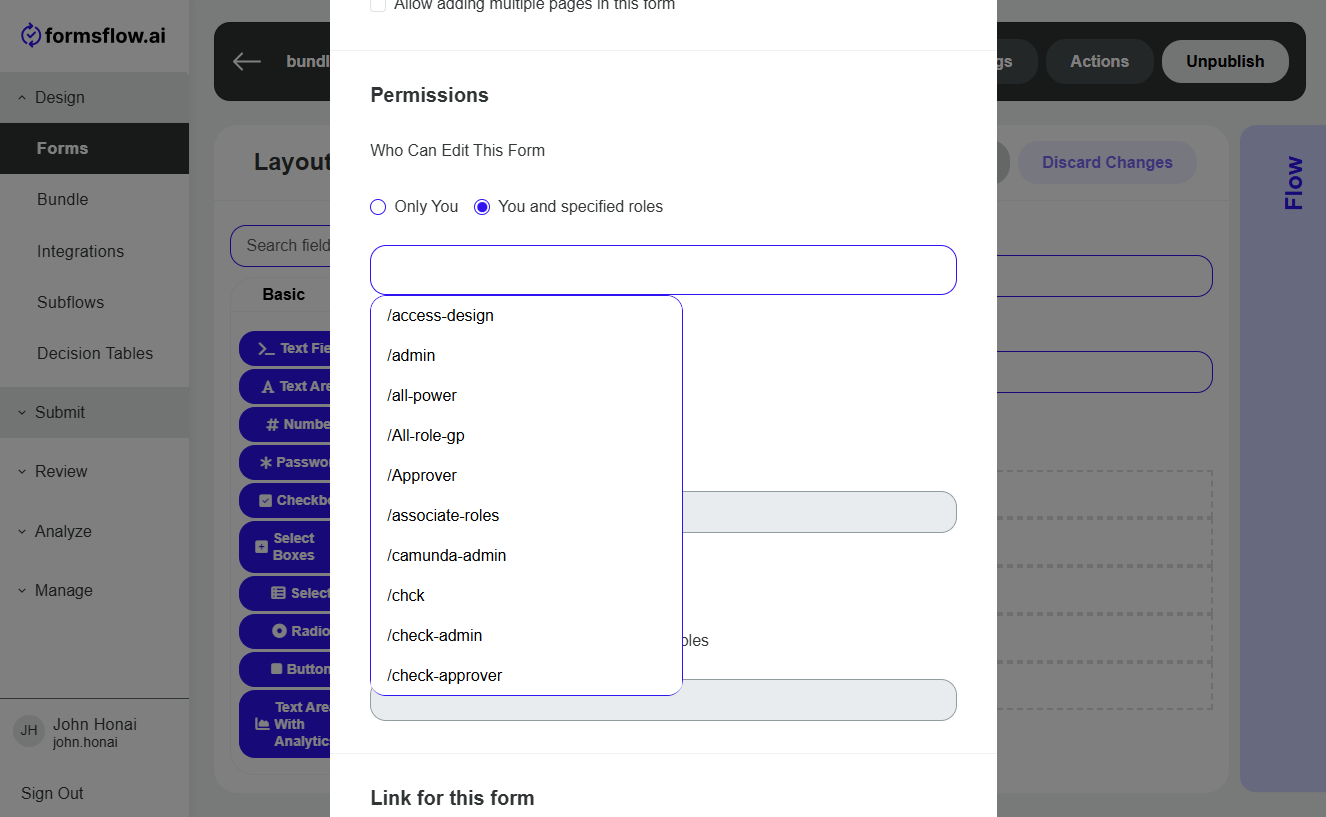
Select permissions for the specific form in its settings (Top bar, right side in the Edit form screen).
For designer permission
-
Case I: Private (Only You): If only the current designer needs to access the form.

Note: The creator of a form will always have access to the form designed by him/her.
-
Case II: You and Specific Roles: Give access to specific groups of people.
Select You and specific roles and then select appropriate groups in the selection below.
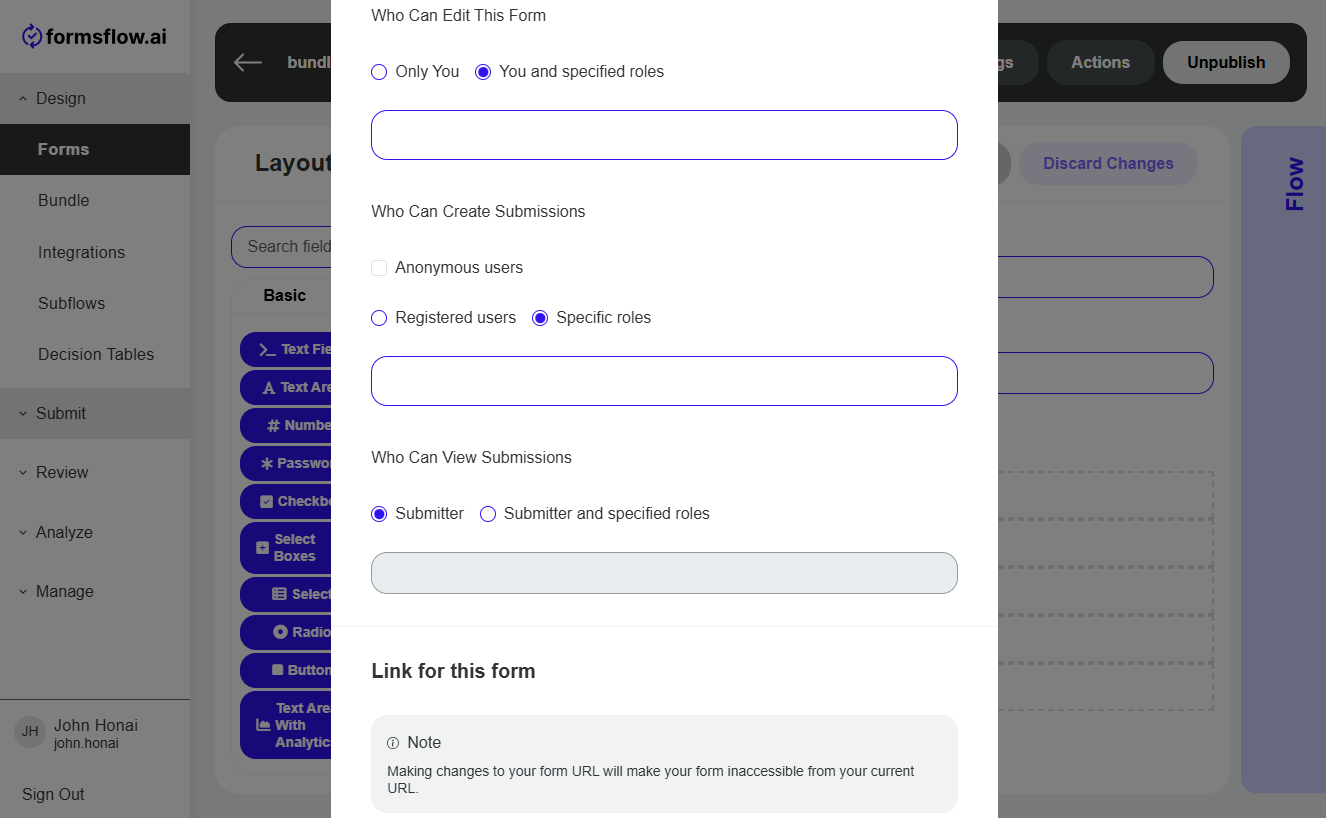
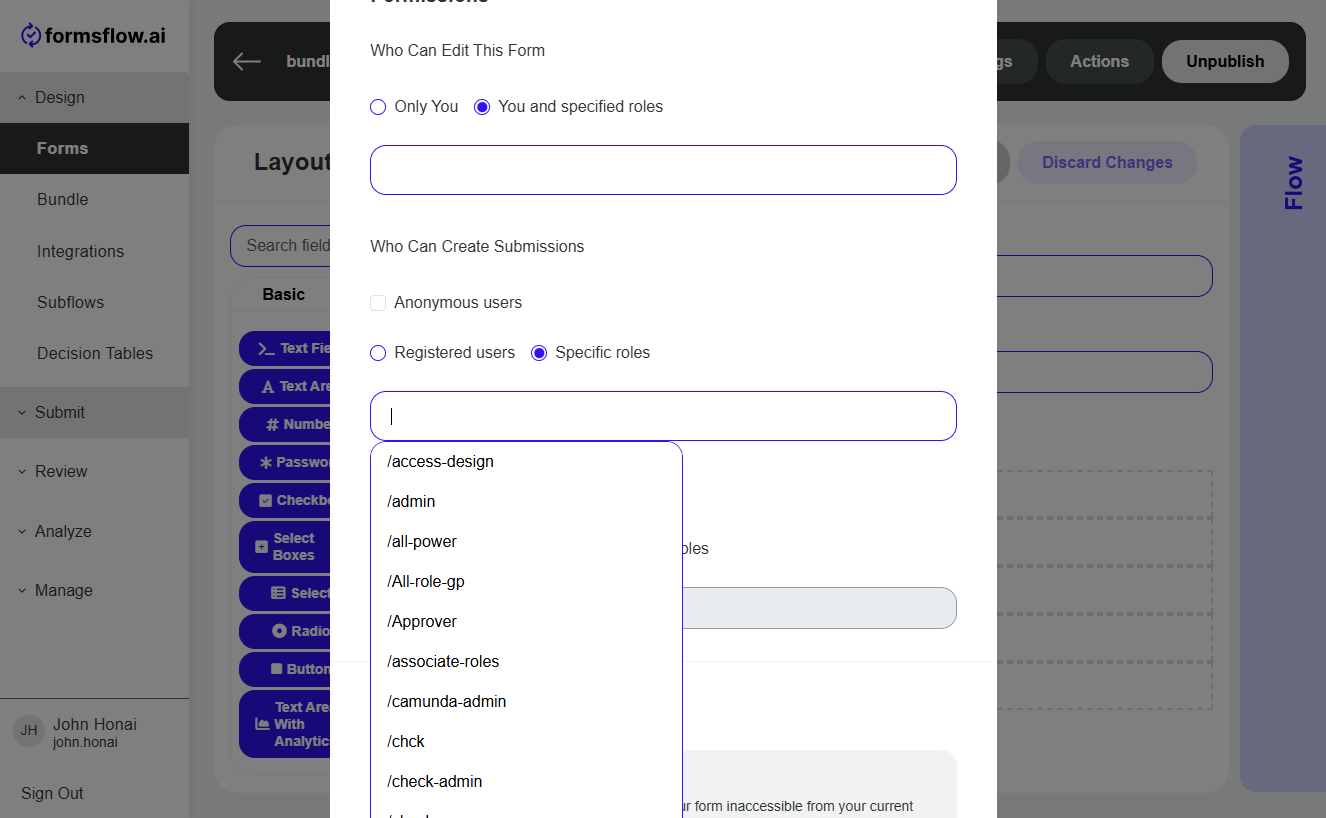
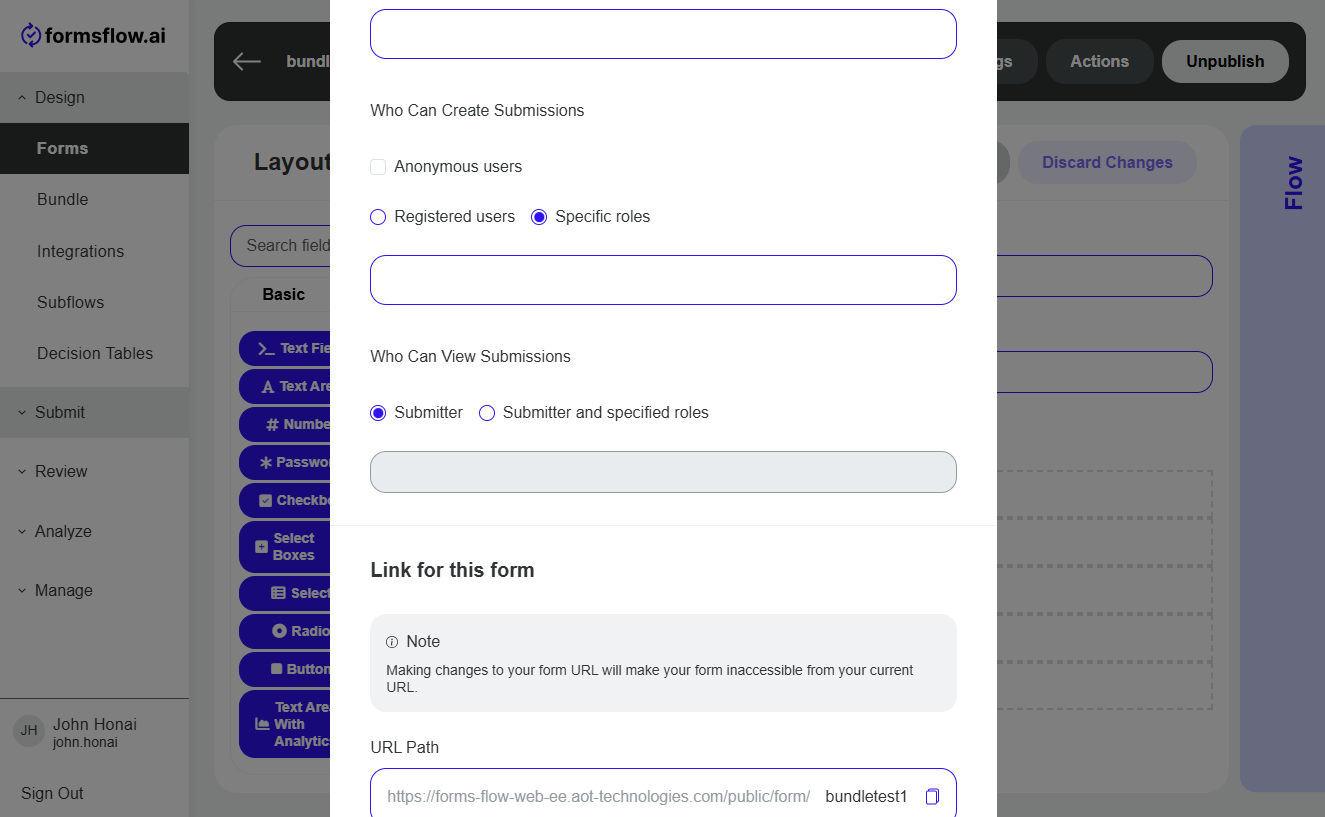
Permission to create new submission
This permission grants exclusive rights to a specified user group, allowing them to create new submissions for the designed form.
-
Case I: All users registered in the system
-
Case II: All users registered + Anonymous users
Check the Anonymous users checkbox
-
Case III: Specific roles
Select Specific roles radio box and in the field below select an appropriate group of users.
Reviewer permission to view submissions
With this permission, the assigned reviewer has the capability to review the submission history of the designed form.
-
Case I: The Submitter of the form
-
Case II: The Submitter + Specific Roles: Give access to specific groups of reviewers
Click on the Submitter and specific roles, and then select the appropriate role or roles in the field below.
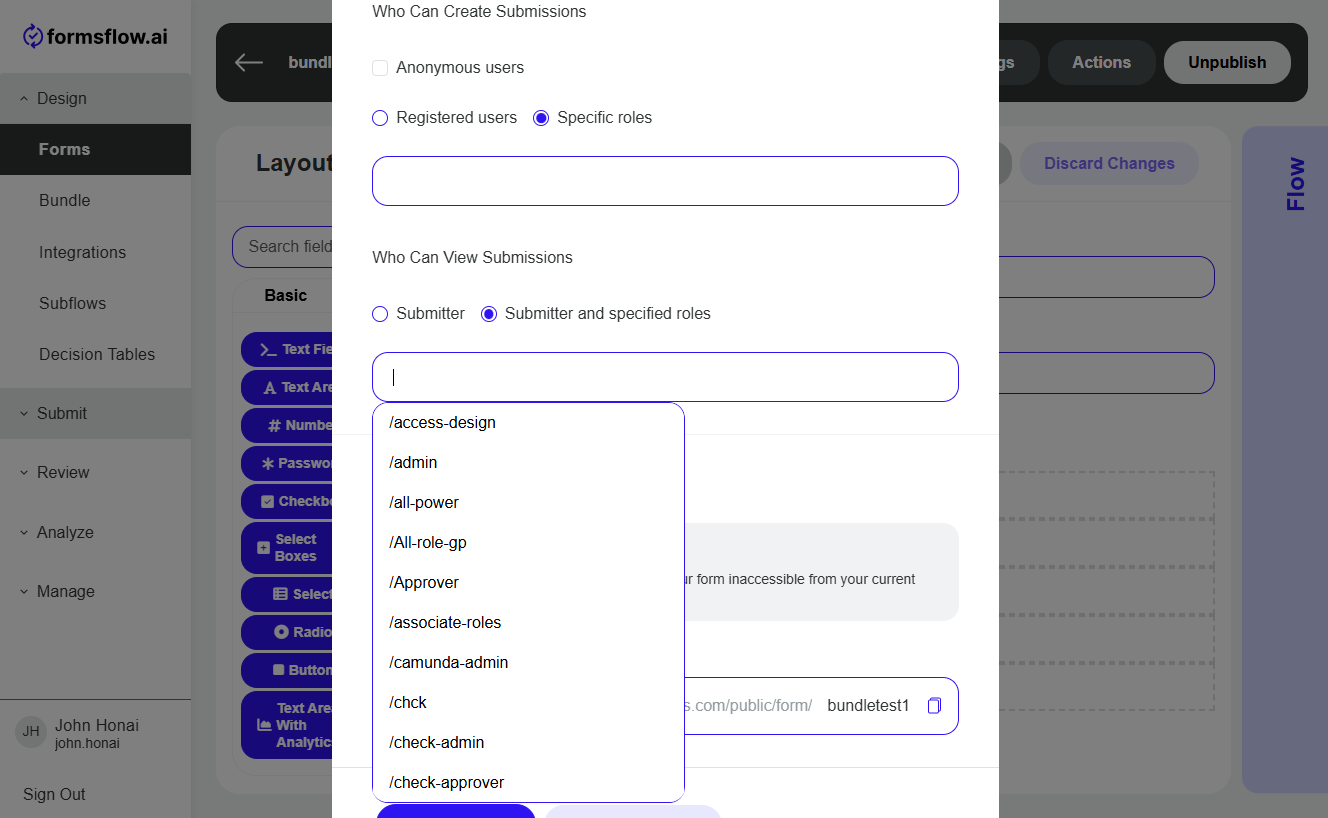
Note: When choosing specific designer groups or client groups, the list contains all the groups available in Keycloak, including the designer groups, client groups, and reviewer groups. The designer has to choose the appropriate group.
-
-
Publish and save the form for client users.
Note: If existing forms are to be listed for clients, you need to migrate the existing Camunda authorizations. For this, you have to run a bash script inside the FormsFlow web API. If you need to run this script in the instance or server, such as a Kubernetes cluster or Nginx, you have to access the Docker container of the FormsFlow web API and execute the bash script called "migration.sh". Alternatively, if you are setting up the environment locally and running the Docker container locally, you can get inside the FormsFlow web API container and run the "migration.sh" command. In the case of running the web API with Flask locally, you should activate the virtual environment and run the bash script within it. You can create the virtual environment by following the instructions provided in the Makefile inside the FormsFlow web API.