No-Code Flow
Premium Feature
Now you can create a flow inside the form without any previous coding skills being a requirement. Flows are a set of actions that execute once a user submits a form. For example, you can send a specified email to the email address the user has provided inside the form.
Accessing the No-Code Flow Editor
-
Login as a designer, then go to Design > Forms page. Here you can either create a new form by clicking New Form in the top right corner, or click Edit on any of the forms you have created previously.
-
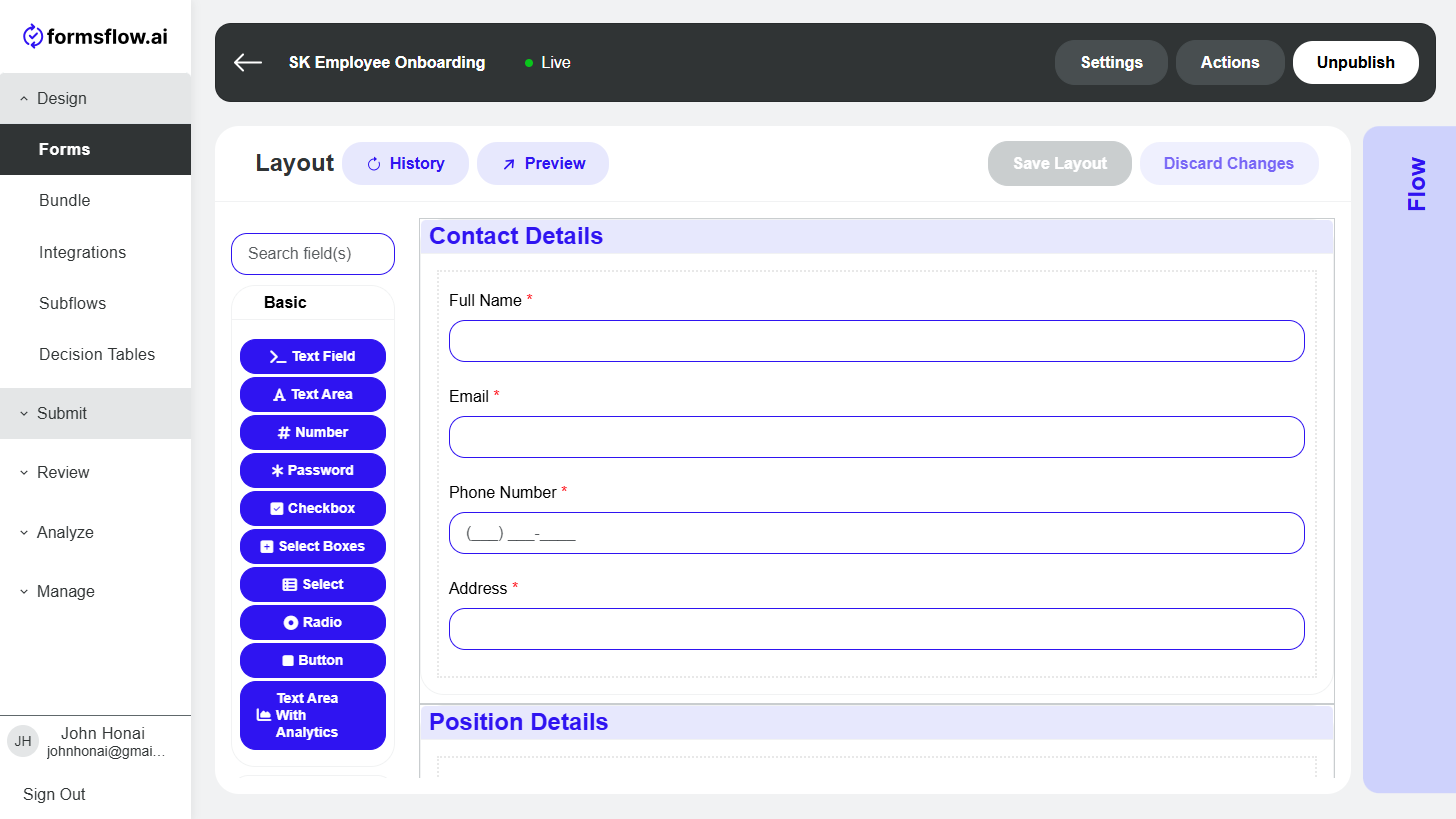
Then on the next page you can see the Layout of the form. This is what is visible to your customers, the visuals of the form. Click Flow on the right side to switch to the flow within this form.
-
On the flow page, you are presented with the No-Code Flow Editor.
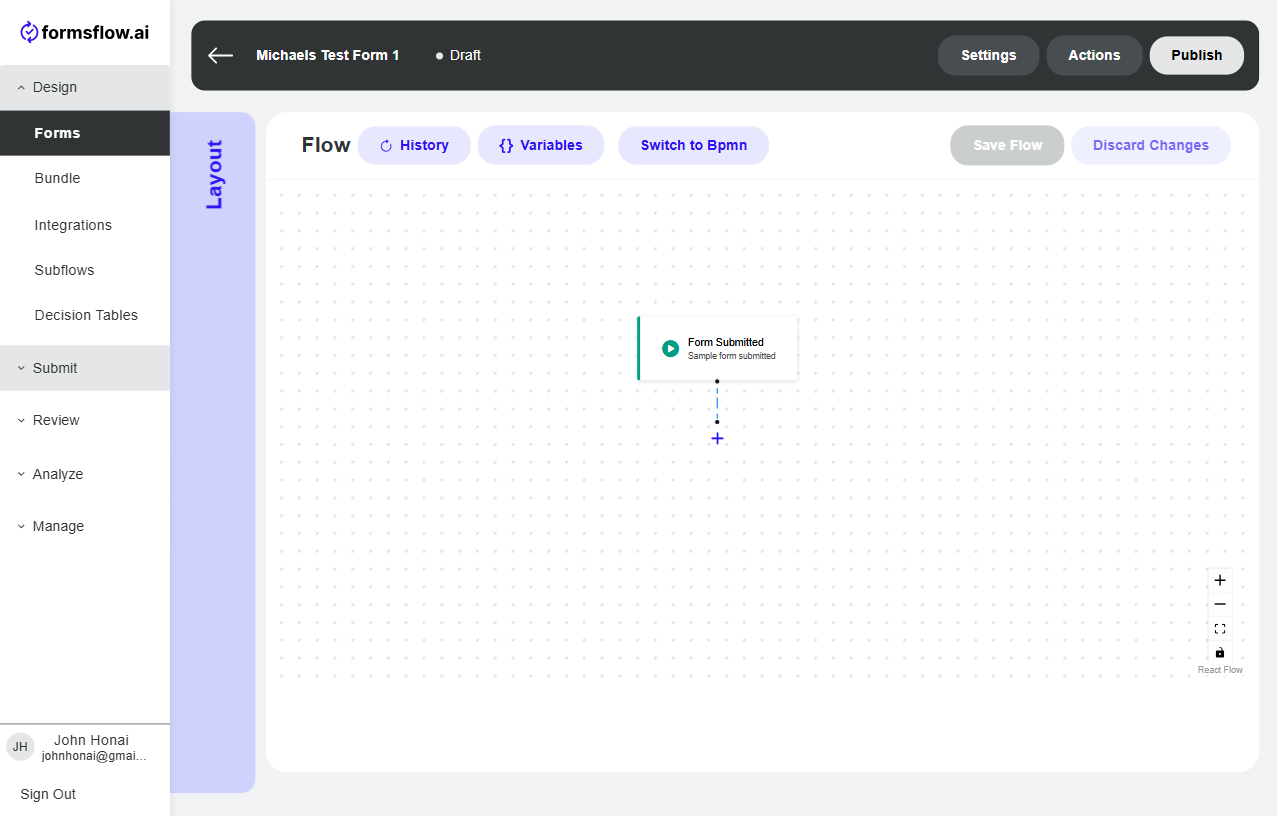
Note: If you see something that is different from this screenshot, then you are in the BPMN editor. BPMN is the advanced editor for the flow. You can either continue editing the flow in the BPMN editor, if you are familiar with it, or you can switch to the No-Code editor. Be warned, some elements might be deleted when you switch from the BPMN editor to the No-Code editor.
-
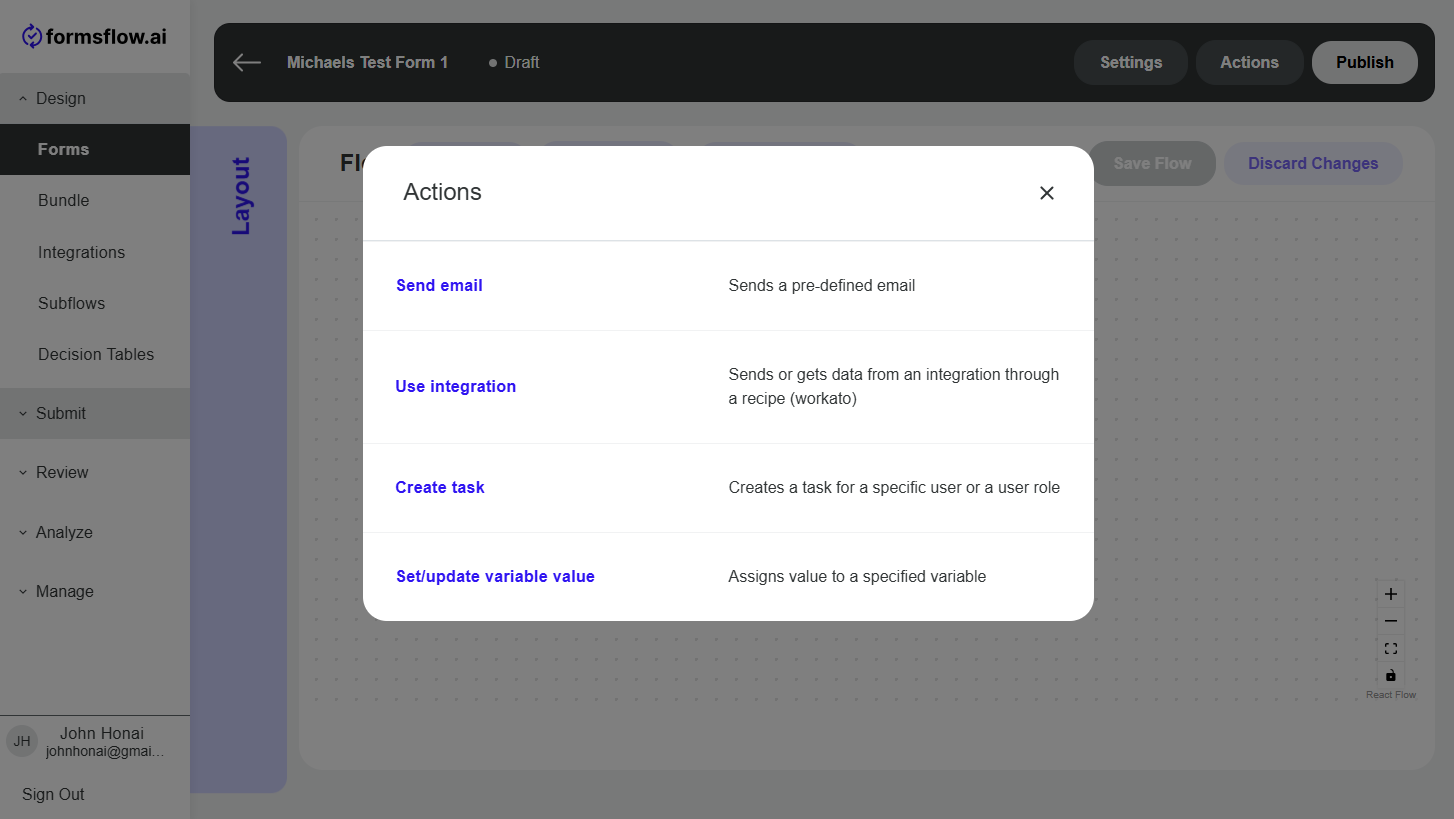
Here you can edit the blocks (pieces of the flow) that have been added previously to the flow if you are editing an already created flow. Or you can add new blocks by clicking the + at the bottom of the flow to add new blocks. There are two types of blocks - Action blocks and Condition blocks. Action blocks are actions that you want the flow to do automatically, and condition blocks are conditions that get evaluated based on some variables from the form's layout. For example, "Send email to everybody that is over the age of 20". First, we add a condition - "The age from the form is greater than 20". If this is true, then we execute an action "Send an email with a specific message".
-
Currently supported actions are:
- Send email - Sends a predefined email to any email address
- Use integration - Send or get data from an integration that has been set up through Workato
- Create task - Creates a task for someone in the organization to work on
- Set/update variable value - Updates a variable from the form with any value you would like, whether it is a specific static value or another variable's value
-
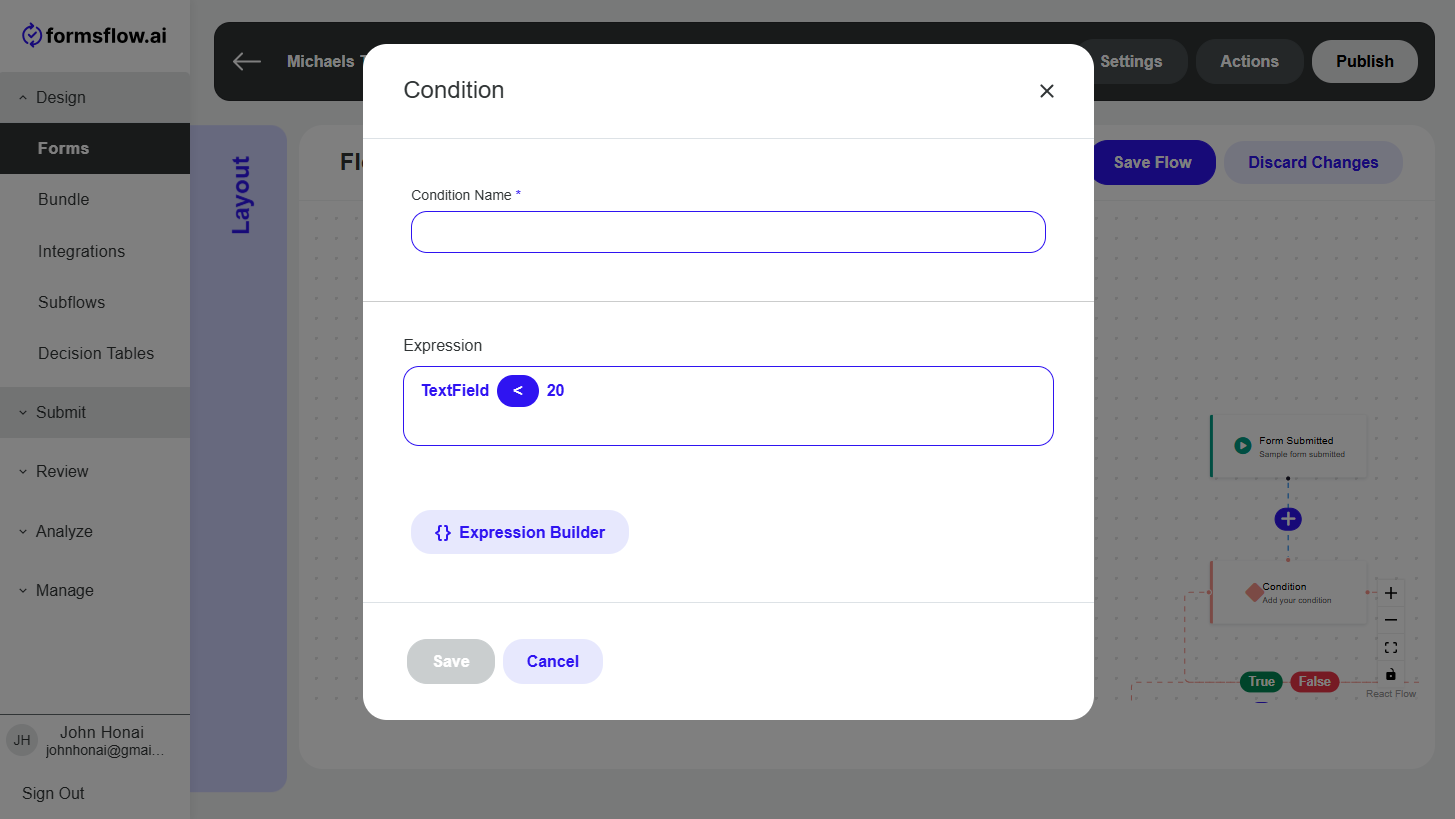
There is only one condition supported for now - an expression. So when you select Condition, it jumps straight into the expression block configuration. Expression compares one or more values and evaluates to either being true or false after its execution.
-
Build your expression by clicking Expression Builder button and selecting variables and operators to validate form submission data.

Note: Do not forget to click save at the bottom after you are satisfied with your expression.
Note: If you do not see the variables in the variables list, please exit out of the popup and click on the Variable button to select the variables you would like to have access to in the flow.
-
Once you are happy with your flow, make sure to save the changes to the flow by clicking Save Flow and to publish the form in the top right corner if you are ready to get submissions to this form.