Native Integration
Premium Feature
The Native Integration module facilitates data integration between different applications and systems across an organization. It provides tools and services to enable the development, execution, and governance of integration flows connecting various cloud-based and on-premises systems.
The Integration module provides an integration and automation platform designed to help businesses connect their diverse range of applications and automate workflows, all without the need for extensive coding expertise. This document outlines the implementation of the Integration module within formsflow.ai.
Exploring the Integration UI
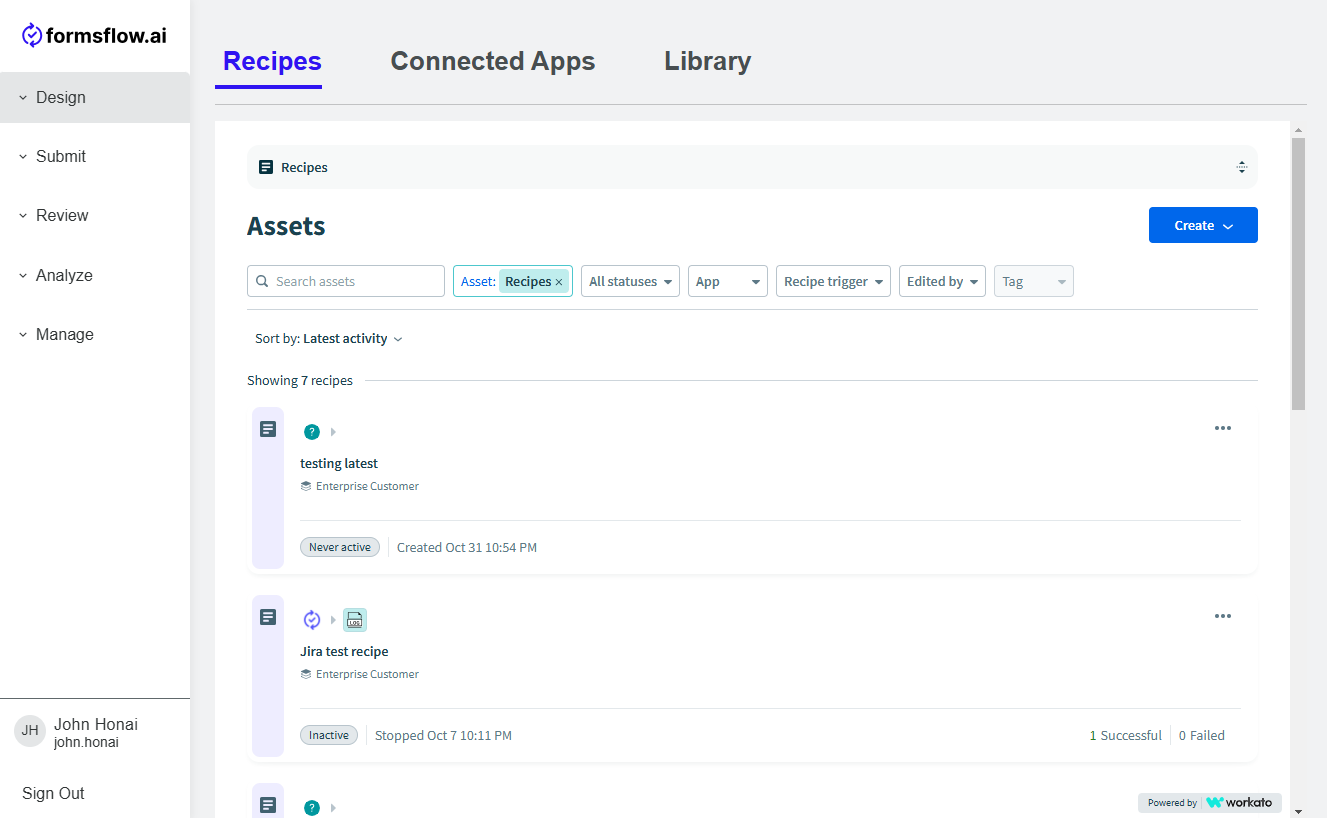
The Integration section (located in Design > Integrations) has three tabs: Recipes, Connected Apps, and Library.
-
Recipe: Create and manage integration workflows using Recipe Editor.
-
Connected Apps: Connect preferred applications and services to streamline automation processes.
-
Library: Access pre-built recipes and integrations from the community, saving time in setting up workflows.
Sample Use Case
In this example scenario, our objective is to develop a recipe for integrating Jira and formsflow.ai. This integration will empower users to generate Jira issues directly from form submissions, leveraging the capabilities of Native Integration. Let's proceed by detailing the sequential steps involved:
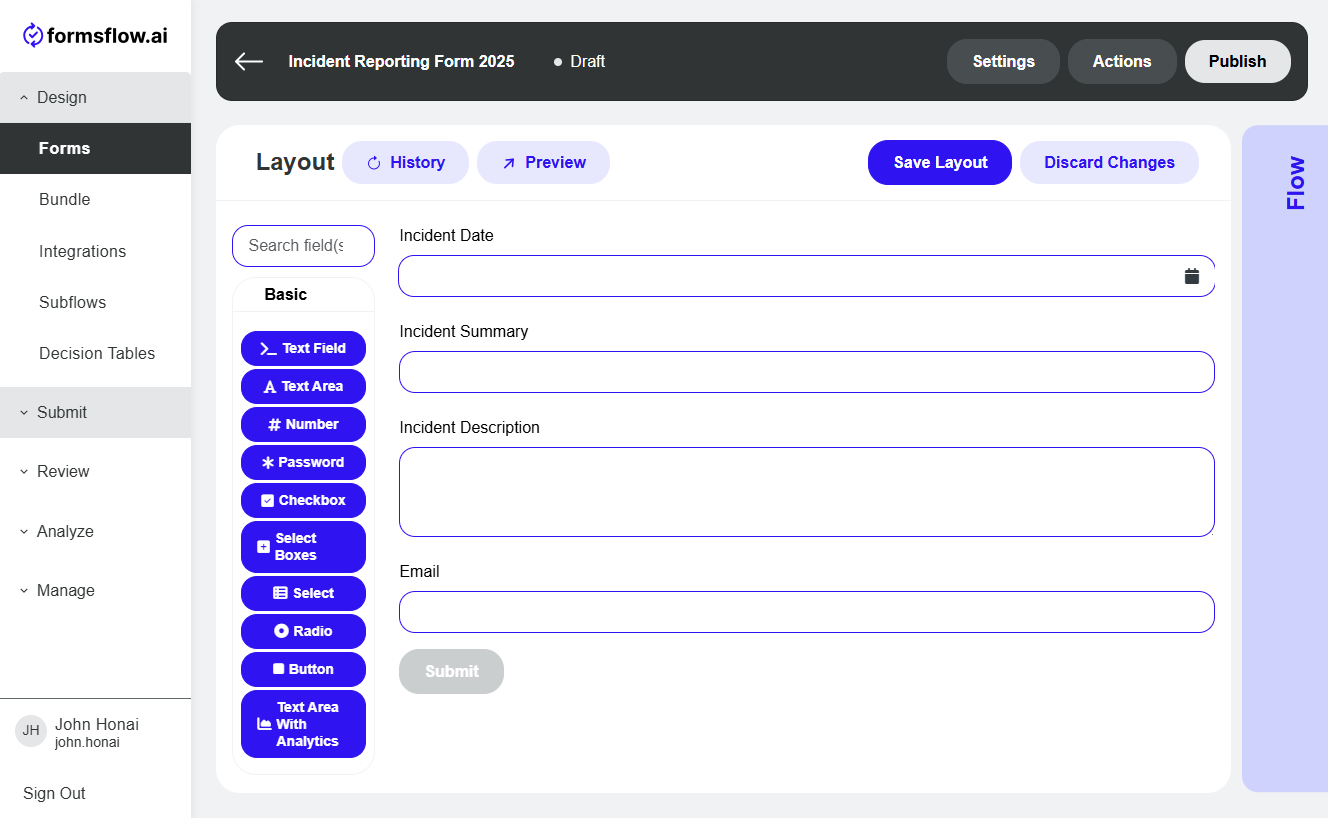
Step 1: Form Design
Design a form with essential key fields, such as incident date, description, and summary, all vital for initiating a JIRA ticket. The below form will be utilized to trigger a recipe.
Step 2: Recipe Creation
i. Connecting apps to be used in recipe creation
To begin creating a recipe, it's necessary to establish connections between the relevant applications using the "Connection" tab.
-
Go to Connected Apps tab, click on Create button, then click on Connection.
-
Please search and select the formsflow.ai application. Once selected, provide the connection name, location, and relevant authentication details such as Client ID, Client Secret, API Base URL, etc.
-
Click on Connect to ensure the connection is set up properly.
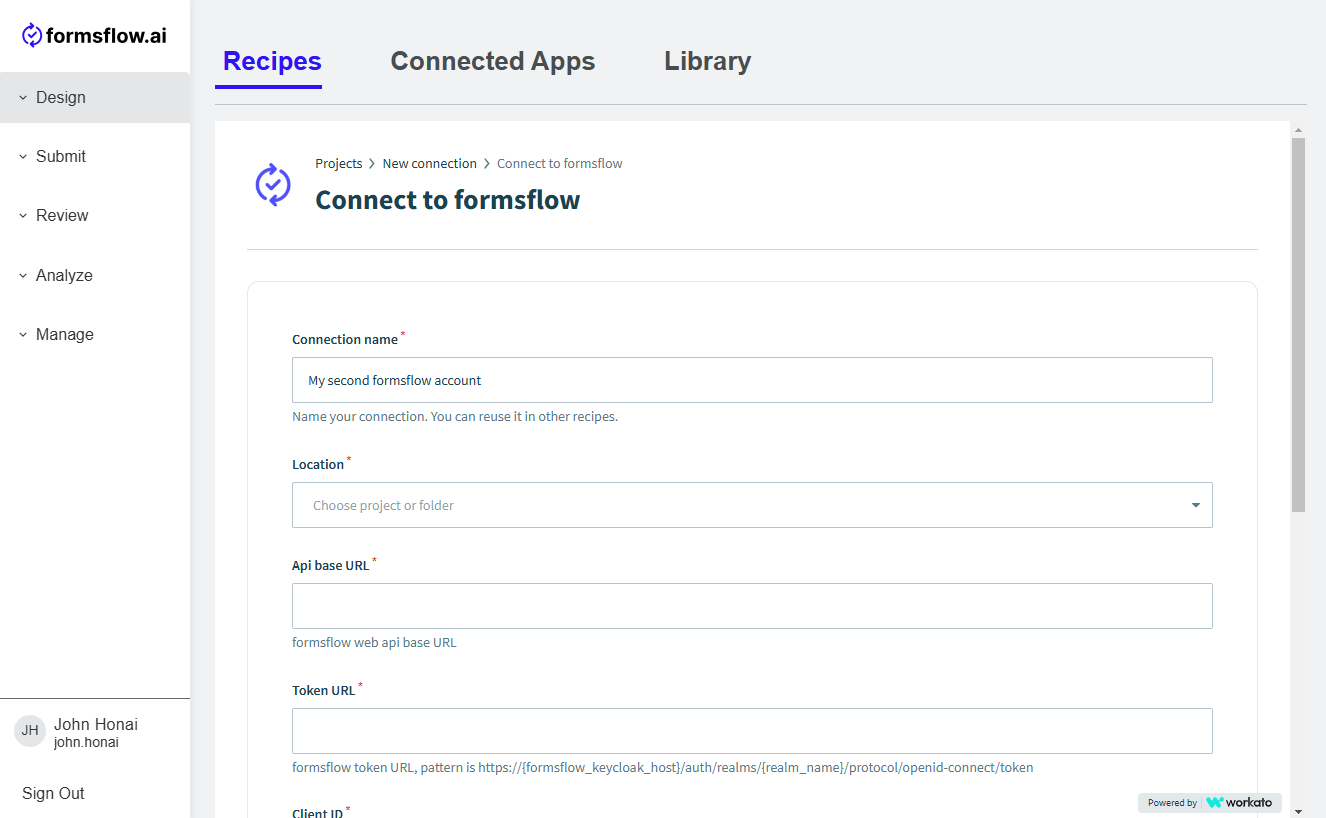
Note: Contact administration to get authentication details.
ii. Build your recipe
-
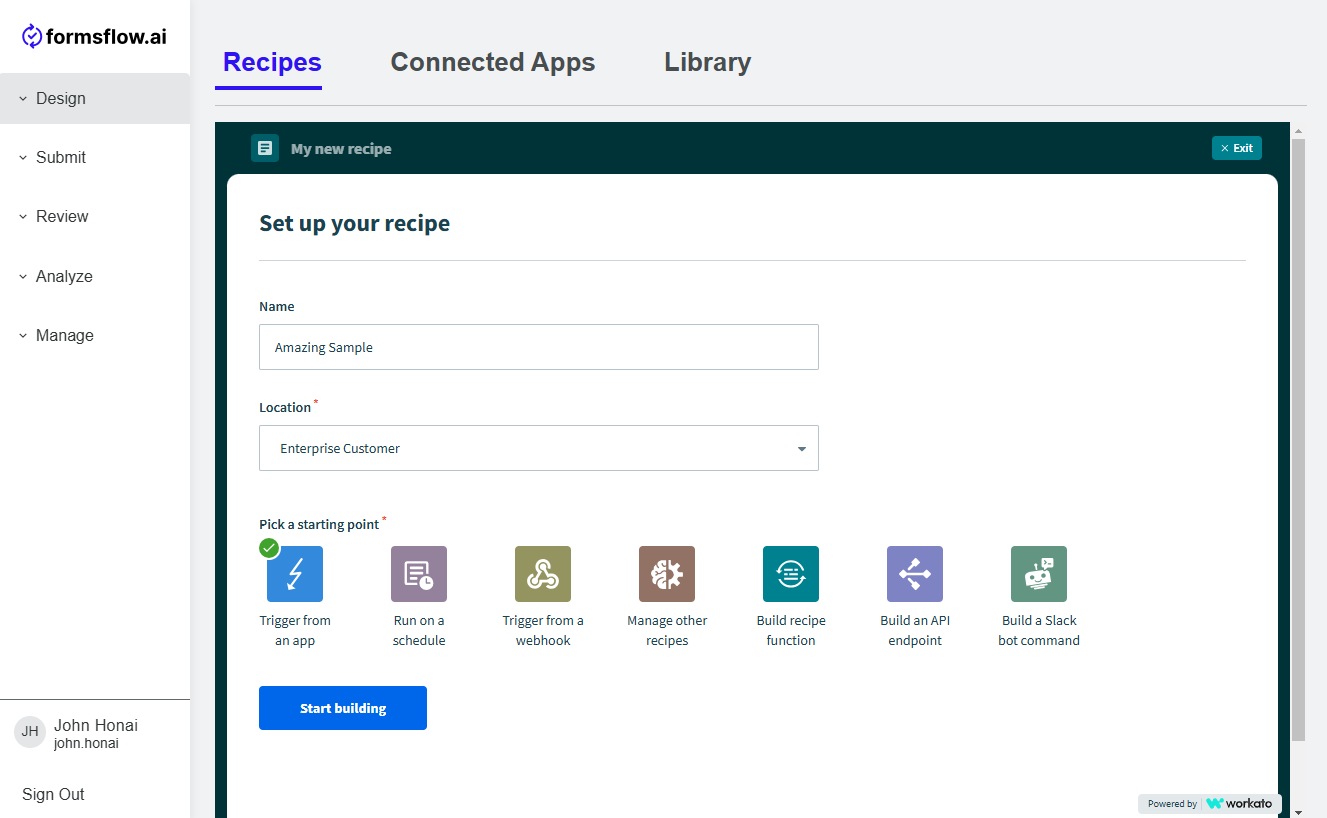
Create a new recipe: Navigate to the Recipes tab and click on Create. Then select Recipe to start building a new recipe.
-
Name and assign location: Give your recipe a descriptive name that reflects its purpose for easy identification later on. Assign it to a location that aligns with its function or the team responsible for managing it.
-
Select a starting point: For integrating with formsflow.ai, select the formsflow.ai connector as the starting point.
-
Begin building your recipe: Once you've selected a starting point, you can begin building your recipe. Customize it according to your needs using the options provided by the Integration module.
Note: Do note that leaving a recipe name blank will result in the creation of a name that is based on the triggers and actions which comprise the recipe.
-
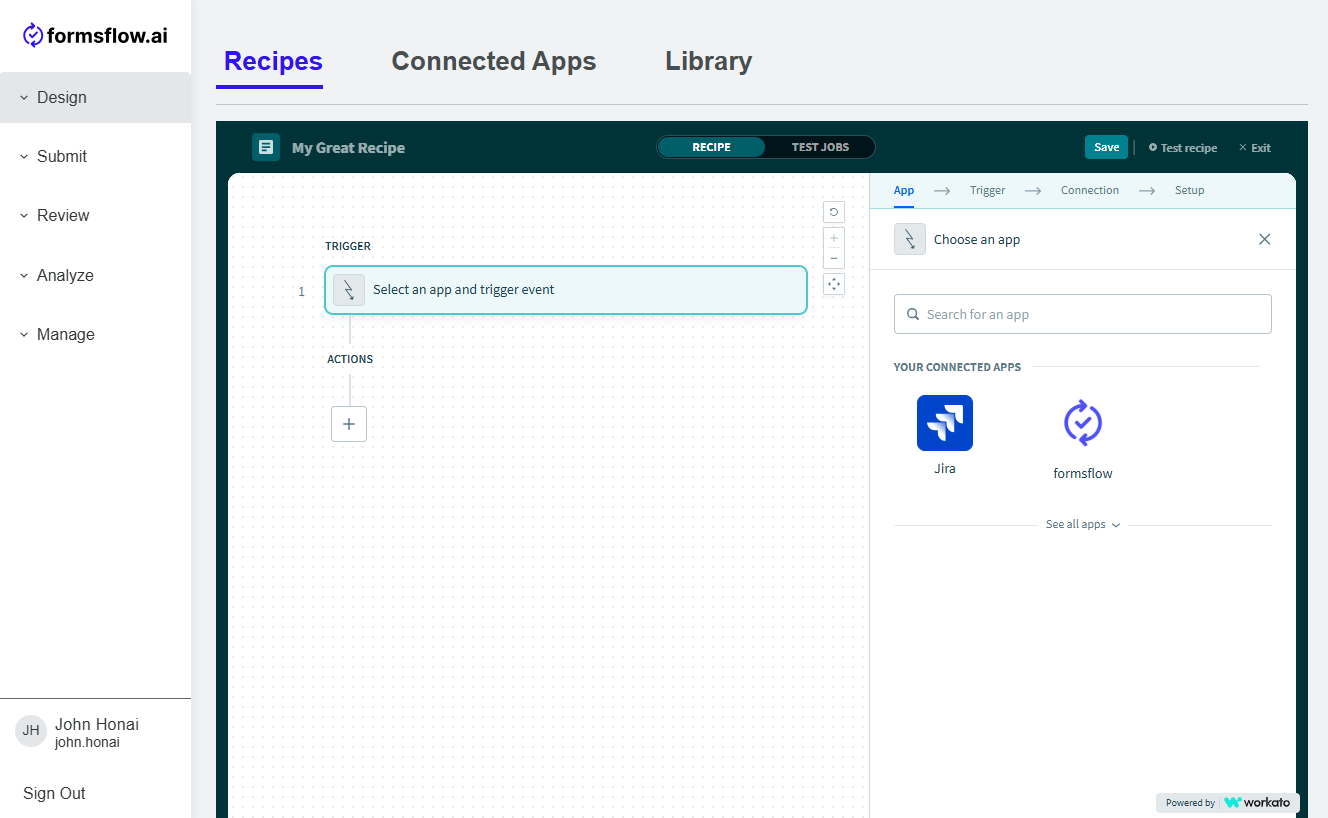
Now a recipe builder opens up and you can see our interface is divided into two sections: the left side showcases the recipe itself, while the right side facilitates trigger and action configuration.
-
Select formsflow.ai from the connected apps displayed on the right side. This will fill in the trigger for you.
-
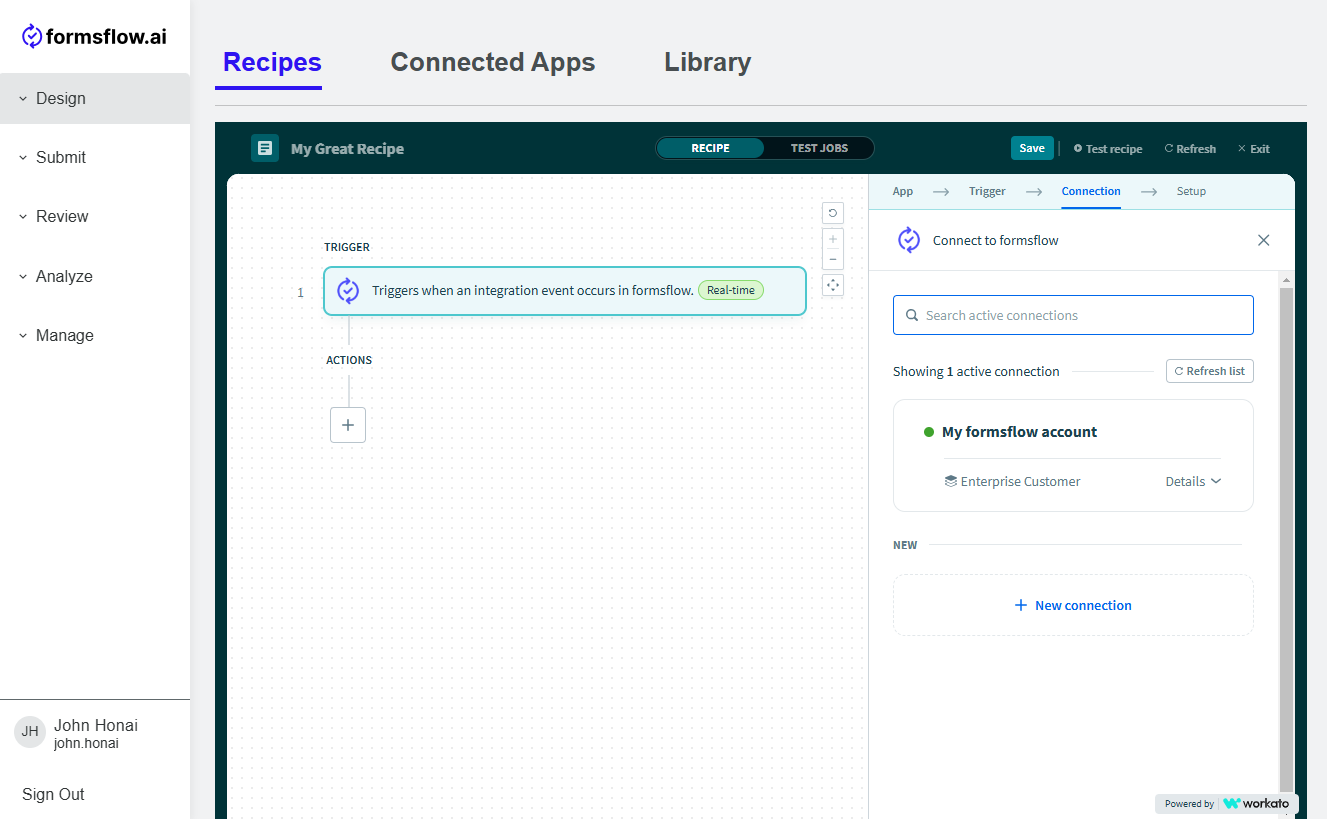
Now click on your account under Connection in use section on the right side.
-
In the next setup window, select the appropriate form under Select Form selectbox.
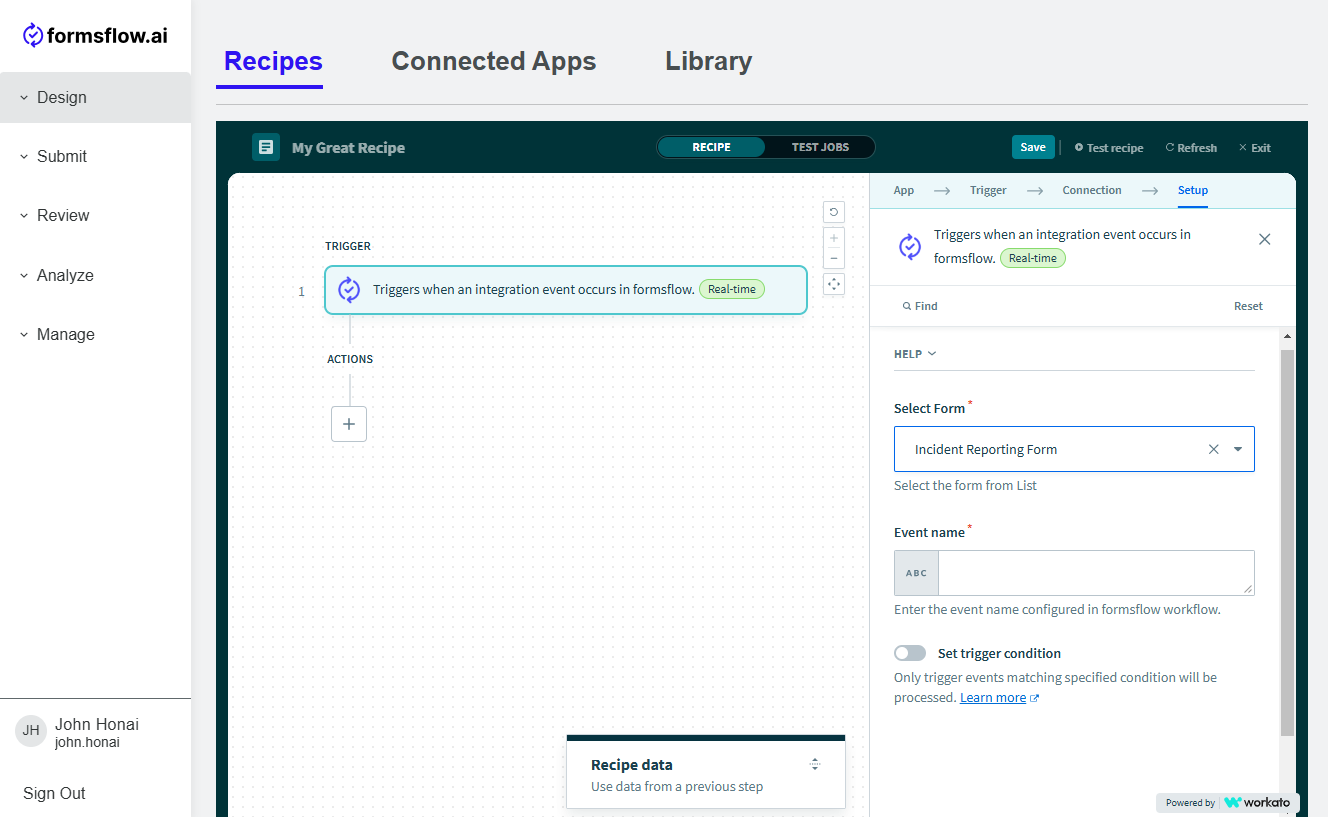
-
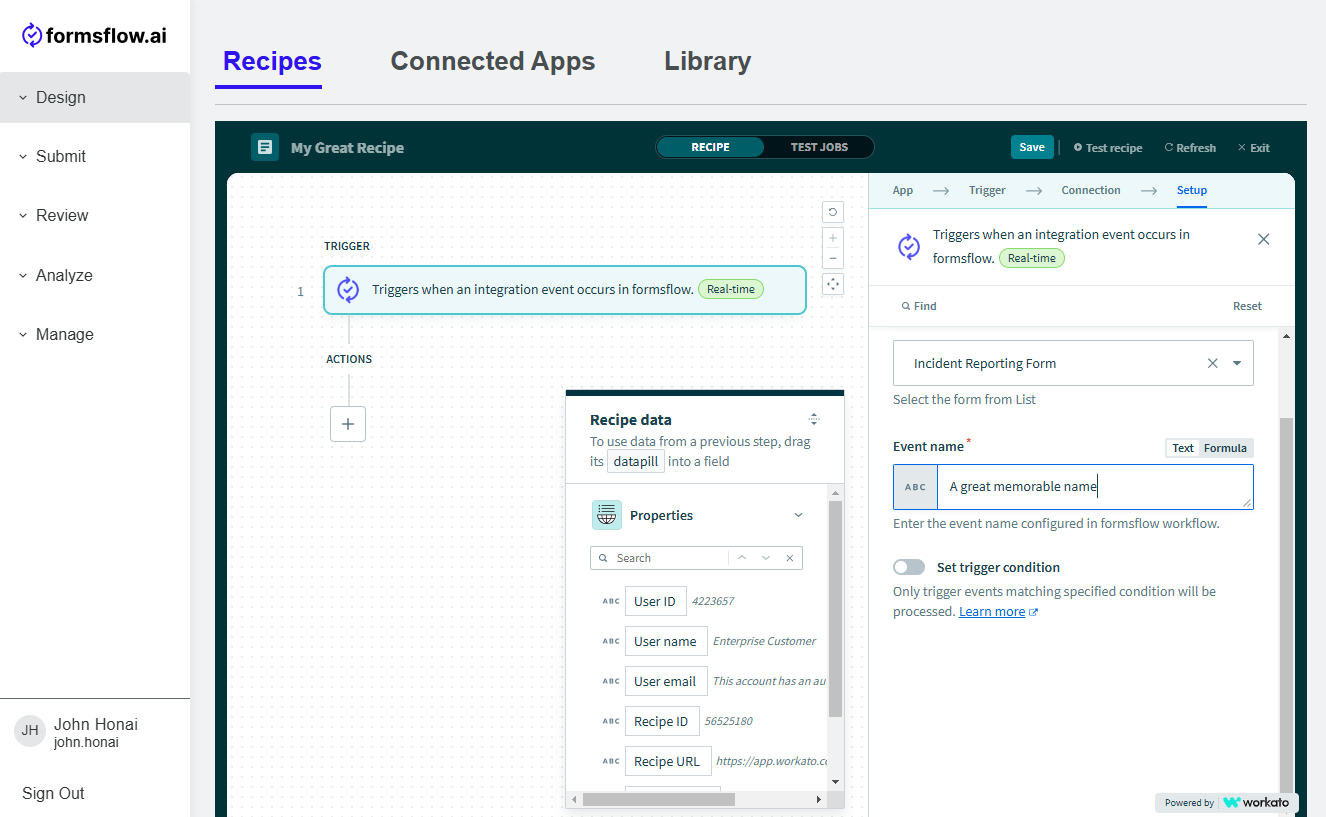
Assign a unique event name to your selected form.
-
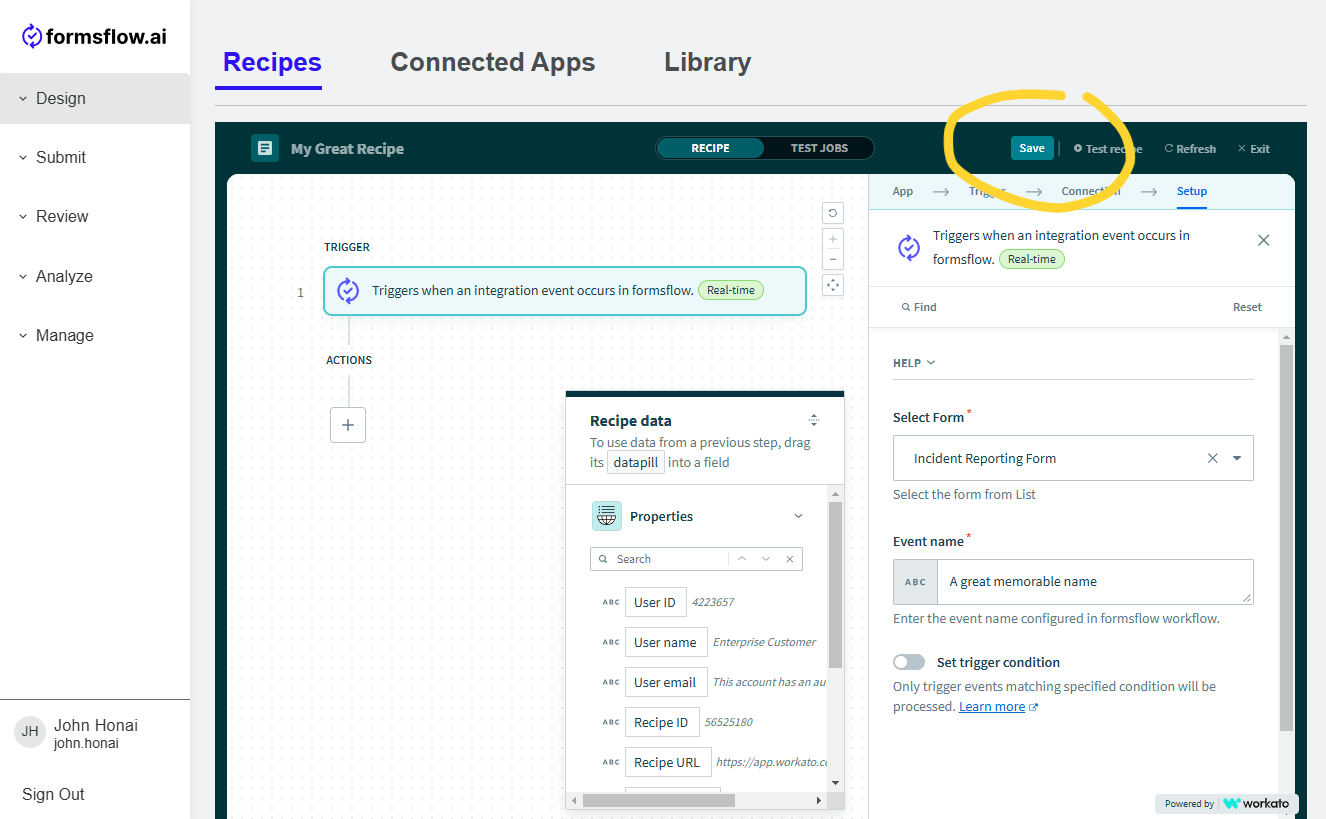
Finally, save the recipe to preserve your configurations. The save button is located at the top right of the Workato window.
iii. Configuring actions
To utilize the action buttons, start by selecting the desired app and action. Any app supported by our integration system can be connected through this interface.
-
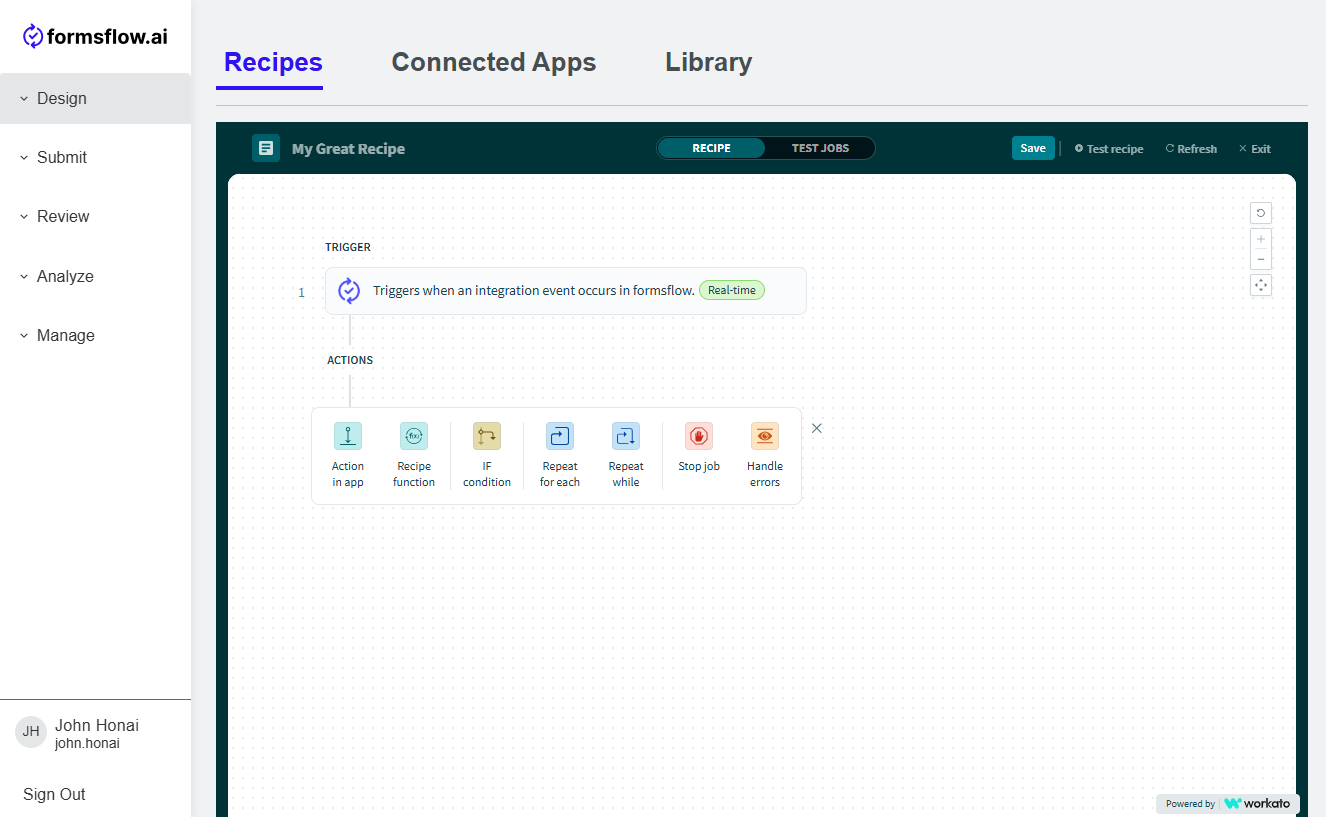
Under ACTIONS, click on + button to incorporate an action into your recipe and select Action in app.
-
Select Jira as the app for the action in the side out on the right. You'll then be presented with a list of available actions within Jira app.
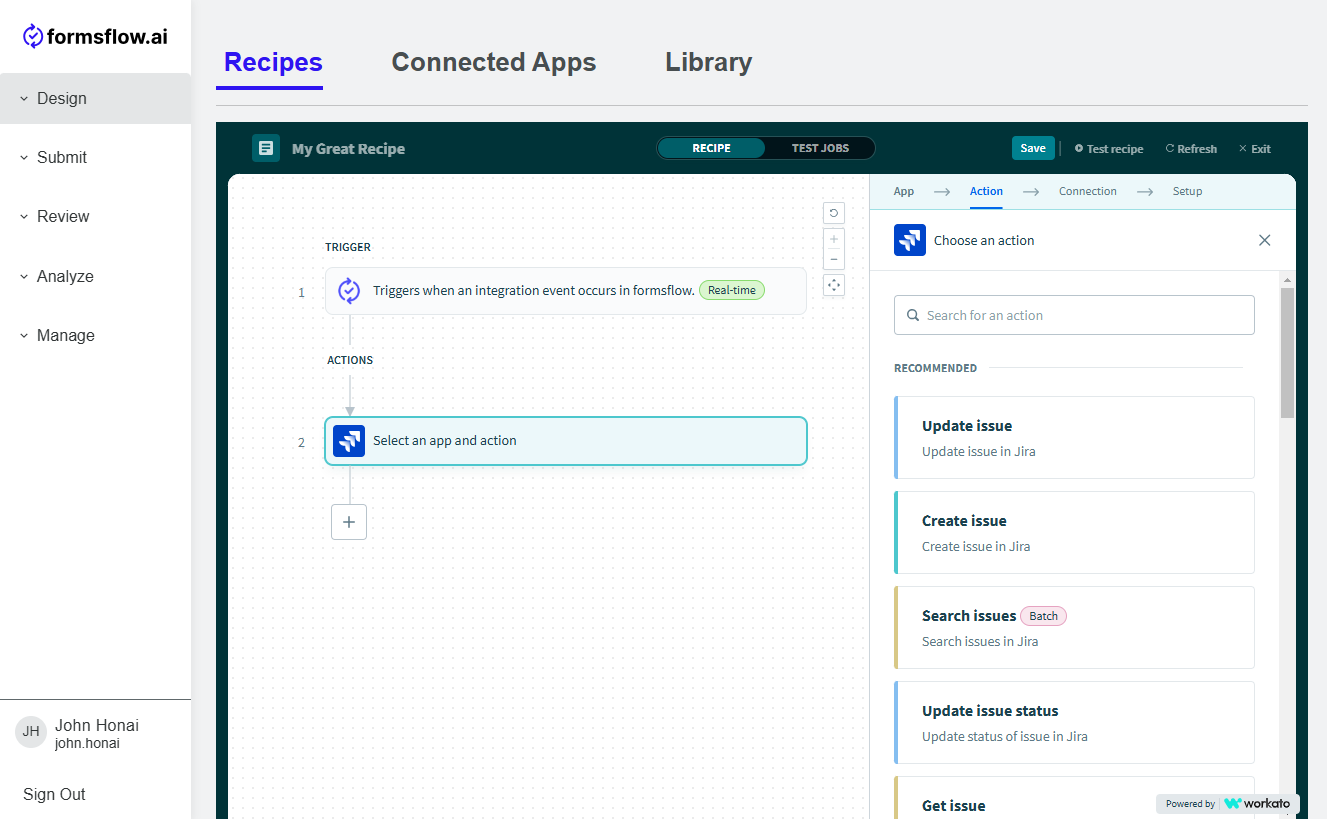
-
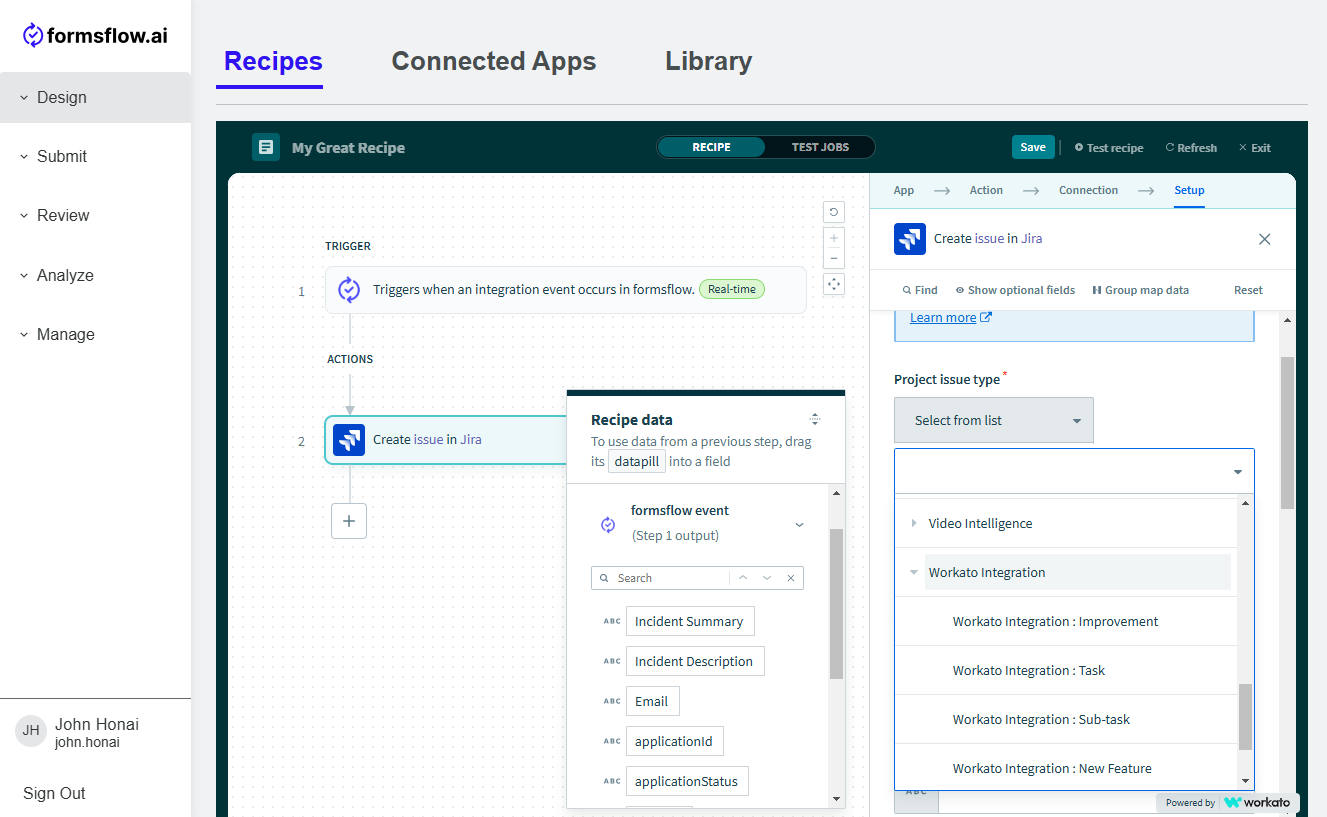
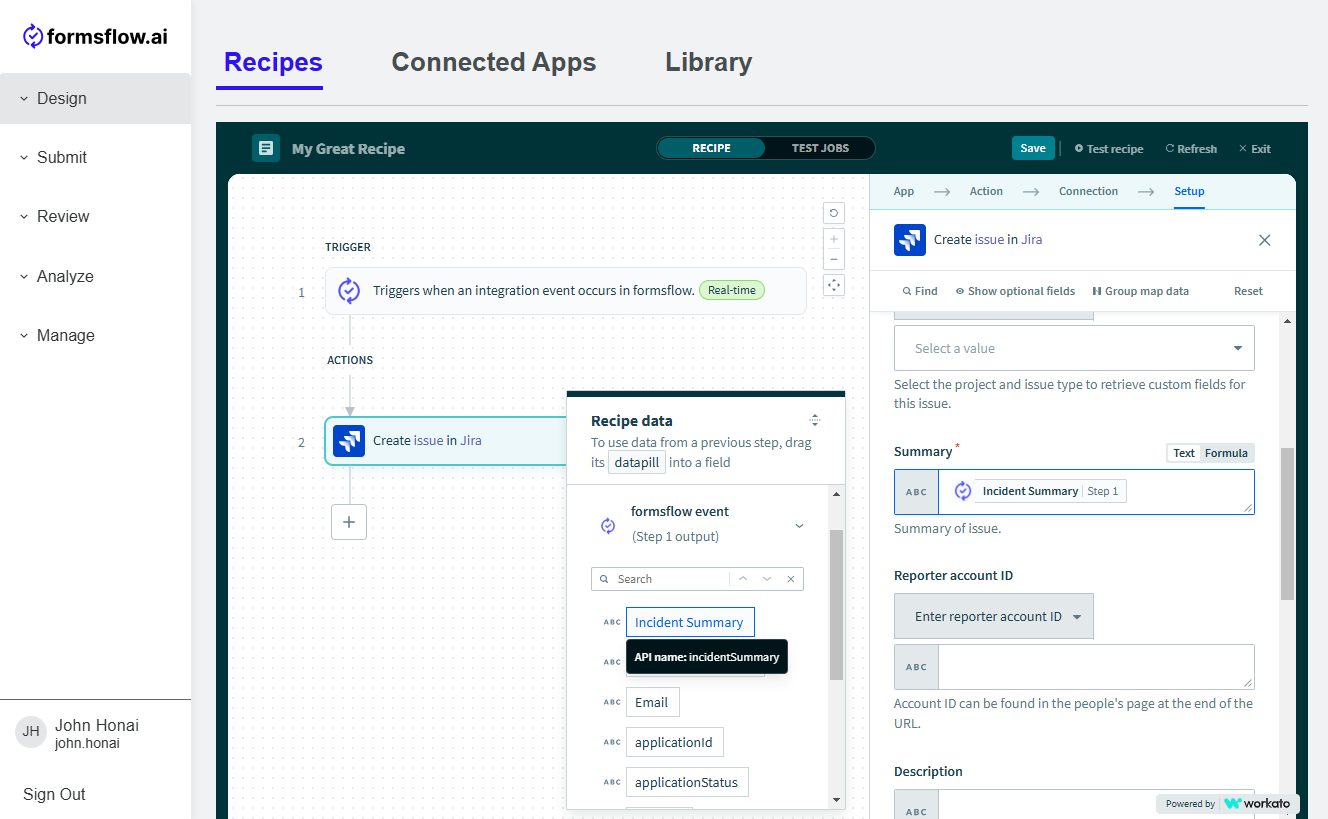
Choose Create Issue from the list and then click on your Jira account in the connections list. Then you can proceed to configure the settings and fields. The system can dynamically populate fields, once you link the appropriate "datapills" with them, such as issue type, summary, description, assignee, and priority, ensuring accurate and efficient data transfer between your connected apps.
-
For project issue type select Workato Integration > Workato Integration: Task.
-
For summary select the datapill on the left side Incident Summary and for description Incident Description.
-
Once you've completed the setup, save the action to finalize the configuration.
-
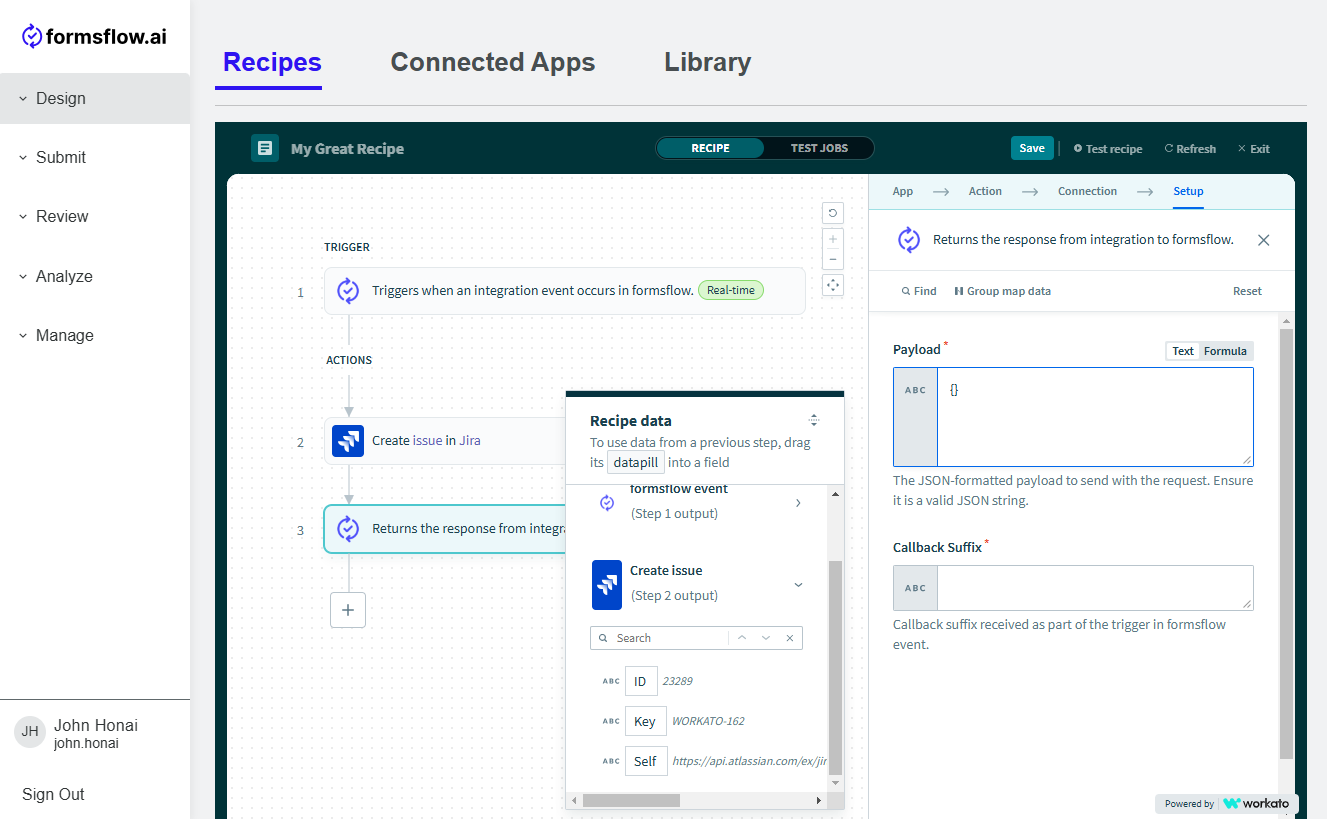
Then add another action by clicking + button and picking Action in app.
-
Choose formsflow.ai and configure the payload by typing "" inside the Payload field.
-
Then into Callback Suffix field add formsflow event > Callback suffix pill from the datapill popup.
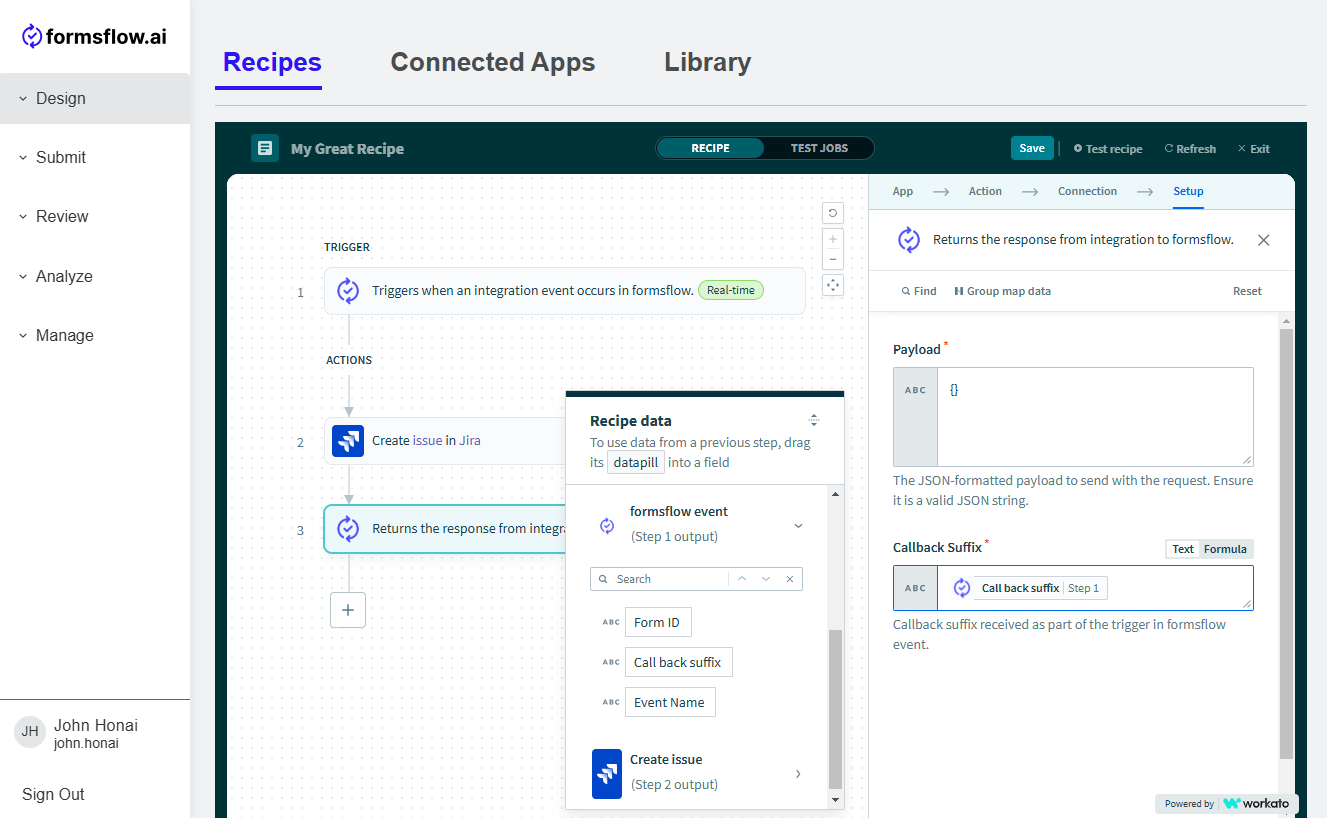
-
Do not forget to click Save in the top right again.
iv. Initiate the Recipe
-
Once all the above steps are completed, user can start recipe by going into Design > Integrations > Recipes and clicking on the overflow menu and clicking Start Recipe.

Step 3: Workflow
-
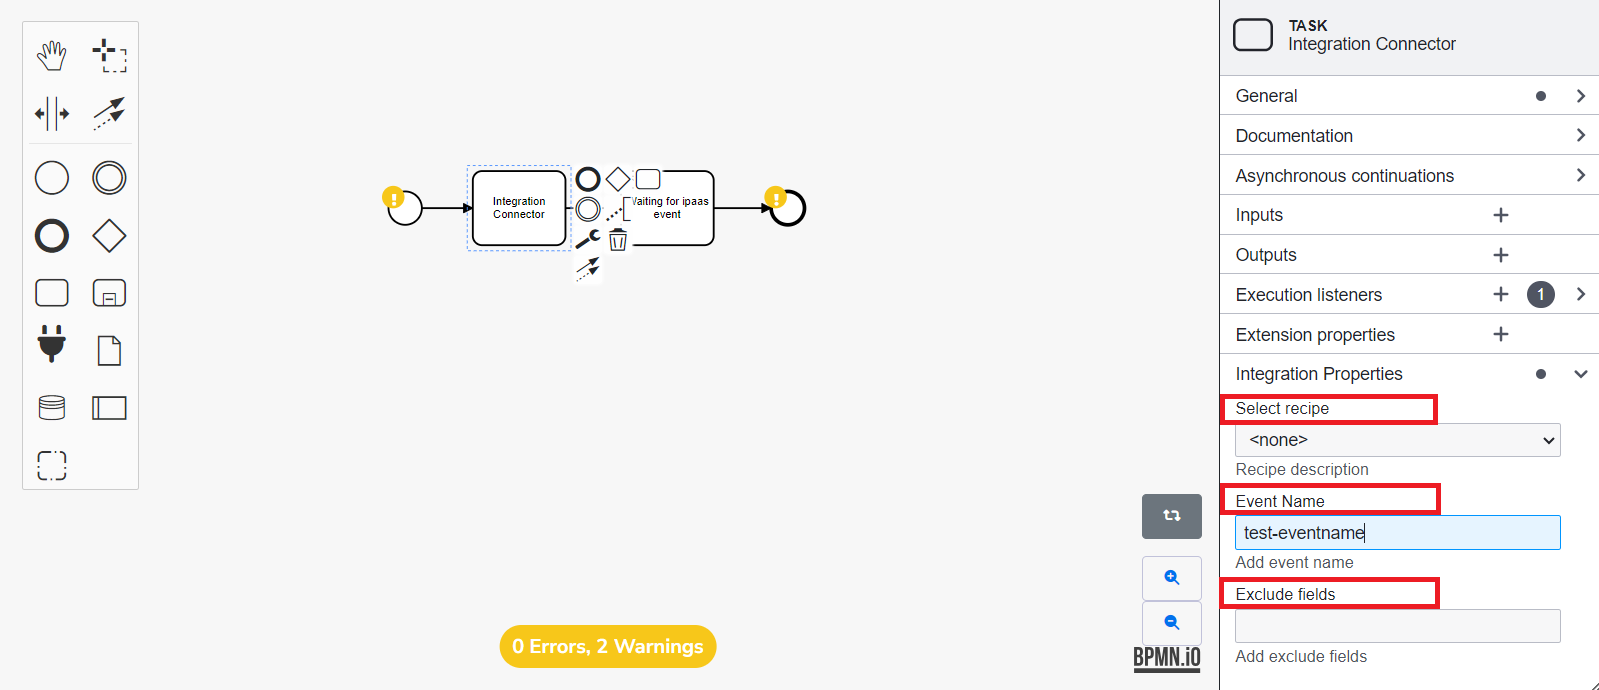
In the form's flow (in BPMN) add the event name and make sure to use the same event name that you previously used during the initial recipe creation to ensure consistency with the workflow.
-
Go to the Select recipe drop-down menu and choose the currently active recipe.
-
If you want to exclude any form fields, add them under the exclude fields section.
Finally, complete the process by submitting the incident reporting form.
After submitting the form, you'll notice the recipe gets triggered and displays details in the Jobs section. Additionally, a new ticket will be generated in Jira containing the submitted issue summary and description.
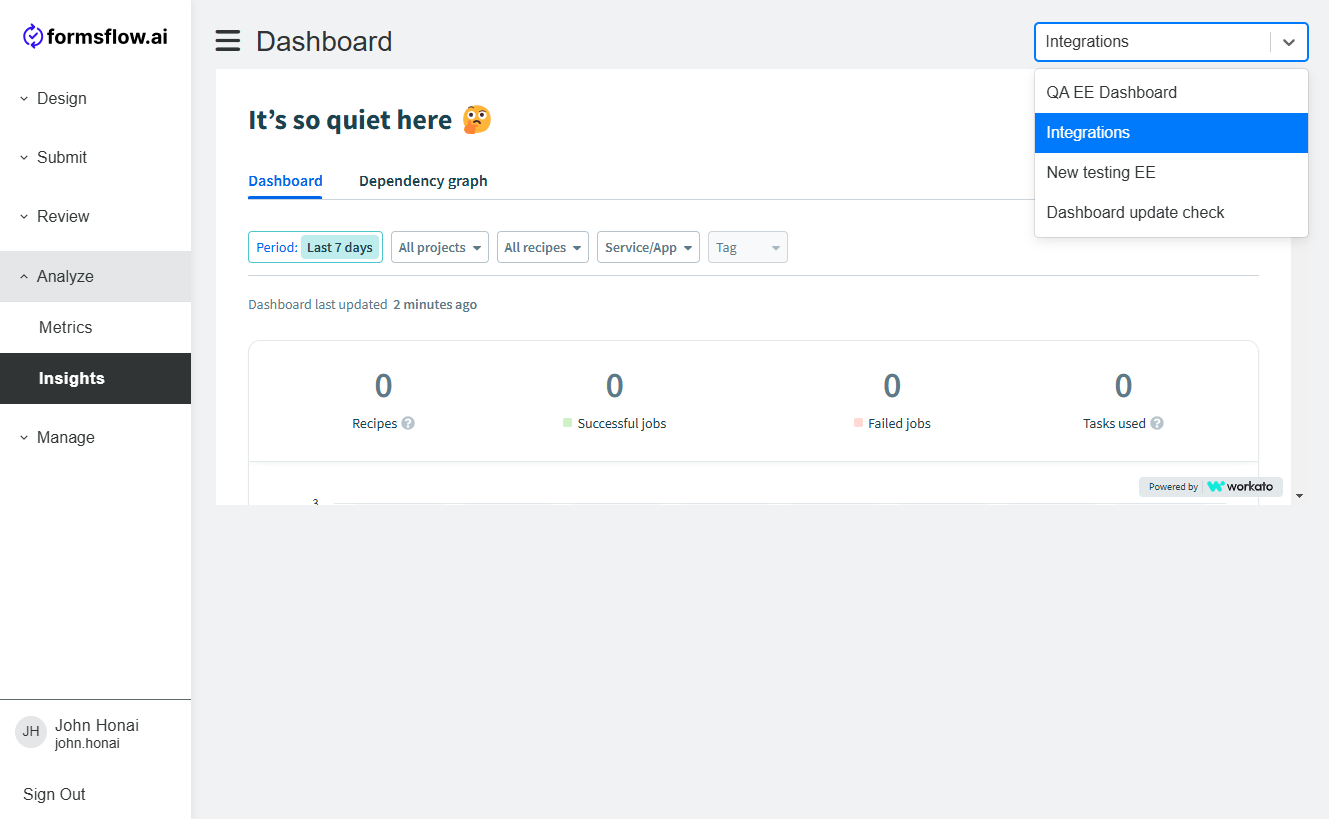
Integrations Dashboard
Upon onboarding a new customer, we establish a dashboard named Integrations delivering crucial insights into integration activities. To ensure data integrity and security, accessing this dashboard requires specific permissions. The Admin tab's dashboard section will have the new dashboard Integrations. However, other users require authorization to access the Integration dashboard and view the integrations activities dashboard. To gain access to the dashboard, users must be members of the analytics group.
We have outlined simple steps to guide users through the process of navigating and utilizing this feature efficiently and productively. Let's explore how to do it seamlessly.
The steps are as follows:
-
Create a new role (Manage > Roles):
This step involves creating a new role specifically for accessing the Integrations dashboard. Example: such as
/formsflow-analytics/group1.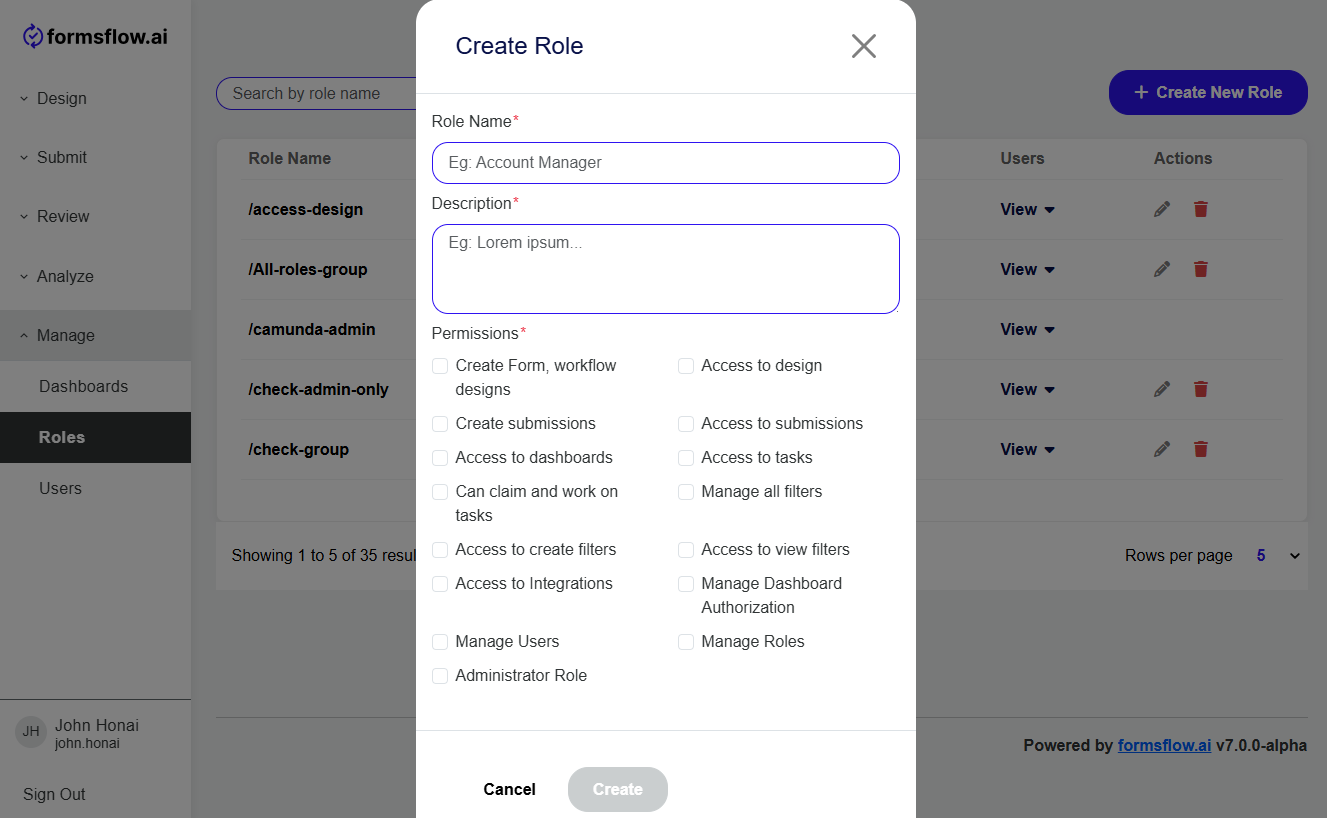
-
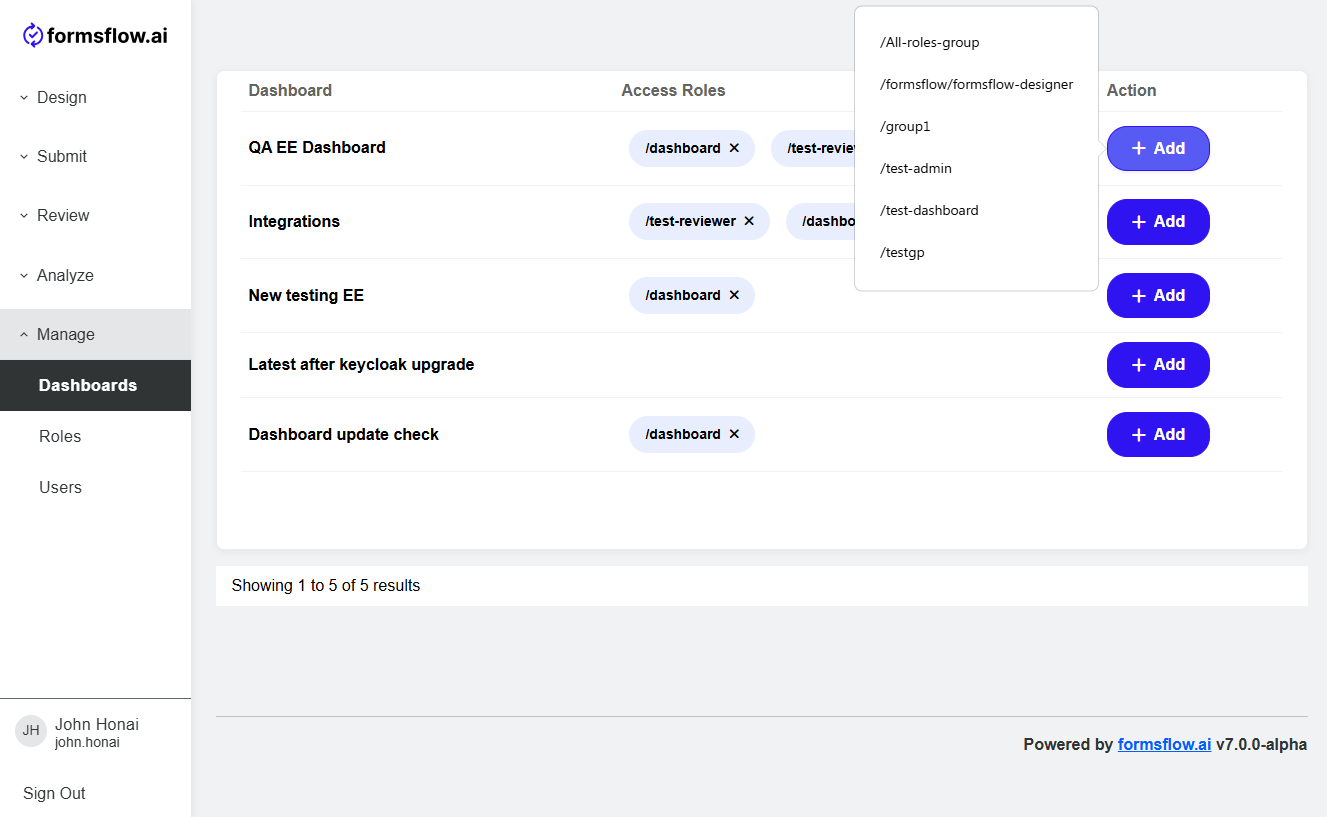
Add the newly created user role within the Integrations Dashboard (Manage > Dashboards):
This step requires adding the user role created in Step 1 to the Integrations Dashboard.
-
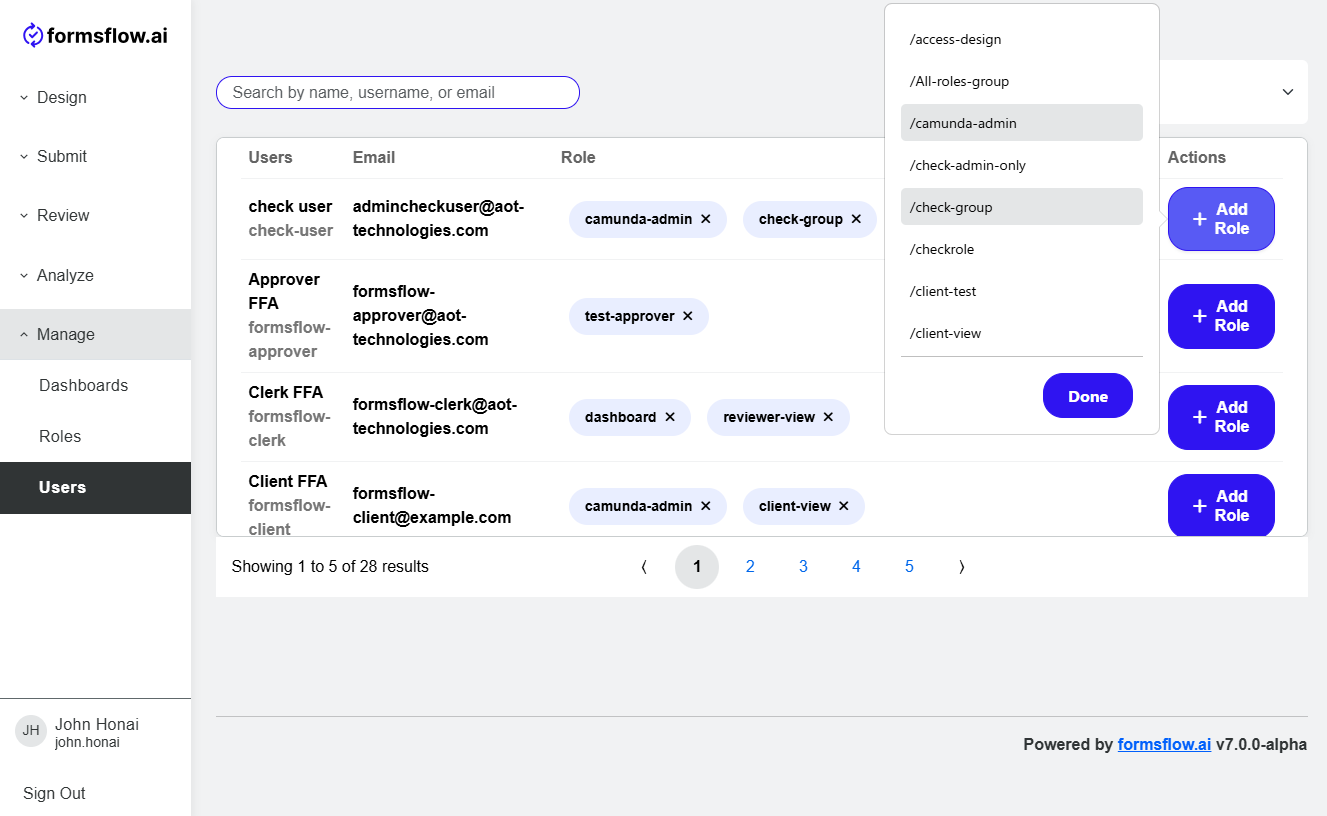
Assign the user role to the person who requires access to the Integrations dashboard (Manage > Users):
In the Users tab, the user role created in Step 1 should be assigned to the reviewer who needs access to the Integrations dashboard.
Once all the above steps are completed, log in as the user you have given the permissions to and navigate to Analyze > Insights page. There in the drop down on the top right check for the dashboard that you have assigned the role to.