Roles and Permissions
Managing roles and permissions in formsflow.ai ensures that each user has access only to the features and data they need. By defining roles and assigning specific permissions, you maintain security, enforce business policies, and simplify administration.
Introduction
Roles group together a set of permissions that control what users can do in the system. Permissions determine access to form creation, submission, review tasks, dashboards, and administrative functions. Assigning roles to users lets you manage access at scale without configuring individual permissions each time.
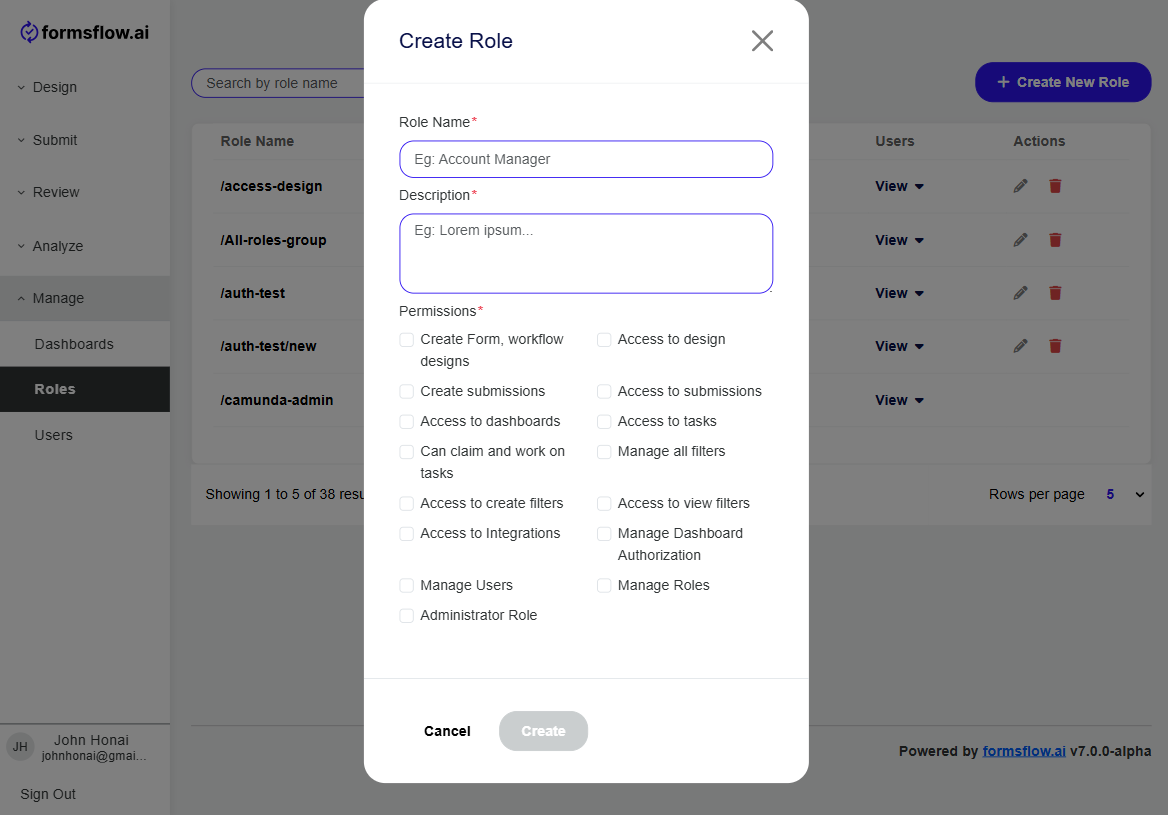
Create New Roles
-
Navigate to Manage > Roles.
-
Click Create New Role in the top right corner.
-
In the dialog, enter:
- Role Name: A clear descriptive name (for example,
Designer,Client, orReviewer). - Description: A brief summary of the role’s purpose.
- Permissions: Toggle on the actions this role can perform.
- Role Name: A clear descriptive name (for example,
-
Click Create to save the role.
-
To modify permissions later, click the Edit icon beside the role in the table.
Permissions Reference
| Permission | Description |
|---|---|
| Create forms | Allow user to design new forms and save form definitions |
| Edit forms | Allow user to modify existing form layouts and field settings |
| Delete forms | Allow user to remove form definitions and associated data |
| Submit data | Allow user to fill out and submit forms |
| Claim tasks | Allow user to take ownership of workflow tasks for review |
| Complete tasks | Allow user to finish and forward tasks to the next step |
| View dashboards | Allow user to access built in or custom dashboards |
| View analytics | Allow user to run reports and view analytics pages |
| Manage users | Allow user to add, edit, or remove user accounts |
| Manage roles | Allow user to create and update roles and permission sets |
| Configure settings | Allow user to modify system wide settings and integrations |
| Generate documents | Allow user to produce PDF or other document outputs |
| Access audit logs | Allow user to view history of submissions and workflow events |
Assign Roles to Users
-
Go to Manage > Users.
-
Locate the user in the list and click Add Role.
-
In the popup, select one or more roles to assign, then click Done.

-
To remove a role, click the × next to the role name in the user’s row. Changes apply immediately.
By following these steps and using the permissions table, administrators can ensure that users have precisely the access they need while maintaining security and compliance.